VMware: Explore Ways To Deploy & Manage Virtual Machines
The Journey to VMware VCP-DCV
VMware: Fundamentals of STORAGE NETWORKING
VMware: Fundamentals of STORAGE NETWORKING
In my last blog, I shared the importance of understanding the Storage Networking Fundamentals & its concepts with comp before moving ahead to VMware Infrastructure at advanced level.
Concept of File & Block Storage.
Understanding SCSI.
SCSI Protocols using
Fibre Channel (FC)
iSCSI.
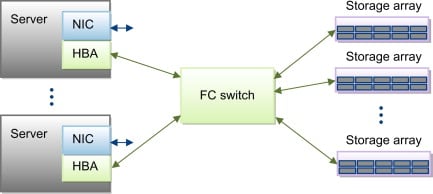
Core Components of Fibre Channel (FC) -
HBA (Host Bus Adapter) / ESXi Initiator
FC Switch
Fibre Optics Cables.
Fibre Channel (FC) Concepts -
World Wide Name (WWN)
LUN Masking
Multipathing
All about Transceivers also known as Small Factor Form Pluggable (SFP) its types - Short Wave & Long Wave.
Shared Area Network (SAN)
In this blog, we will dive more towards VMware VM Creation & its Management.
Ways to Create & Configure Virtual Machine
1. Traditional Method
A Virtual Machine creation is pretty straightforward within vCenter.
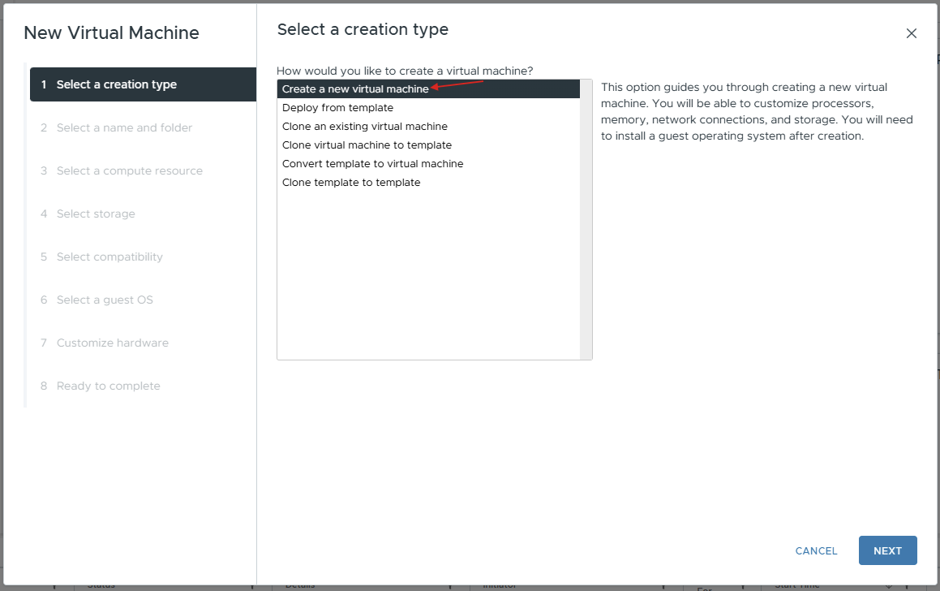
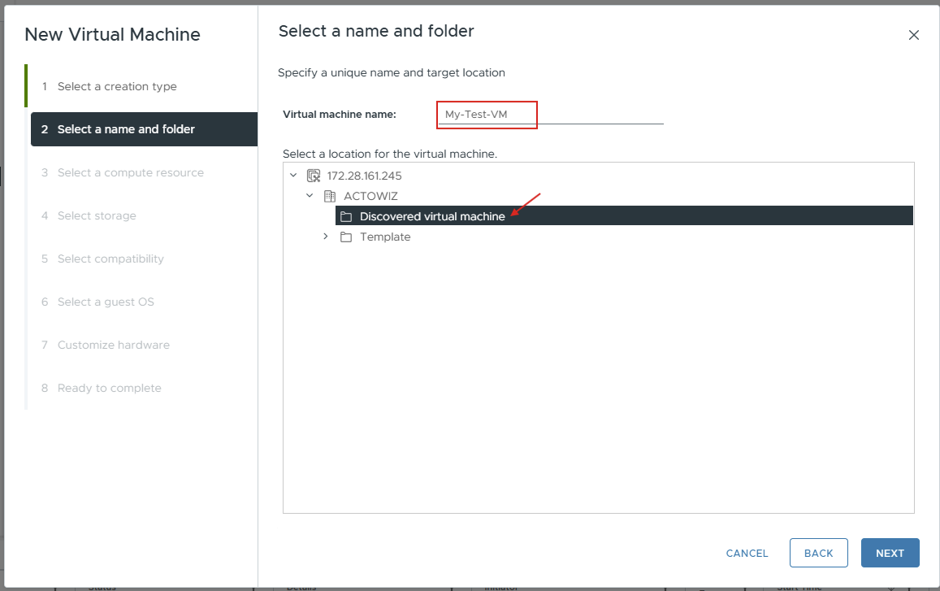
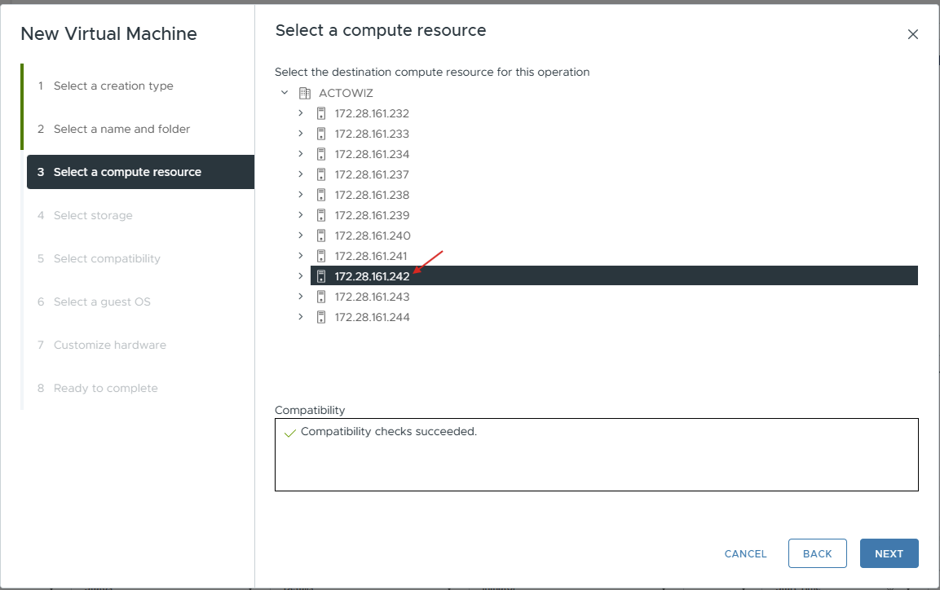
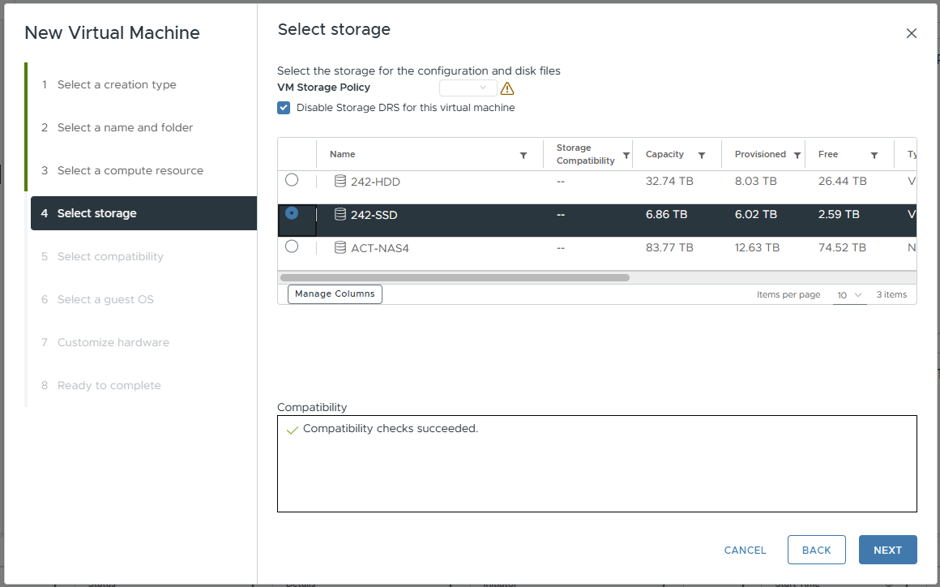
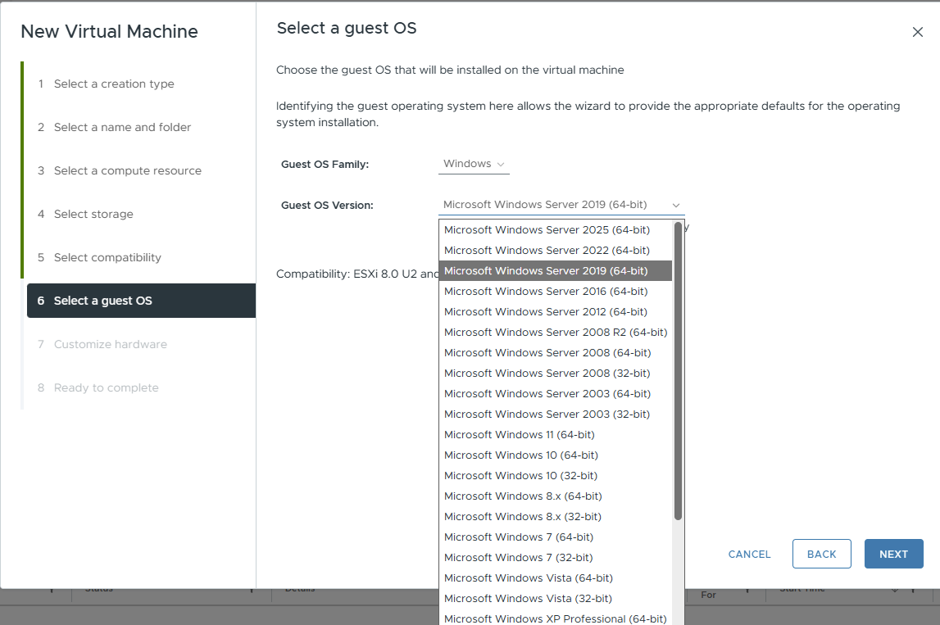
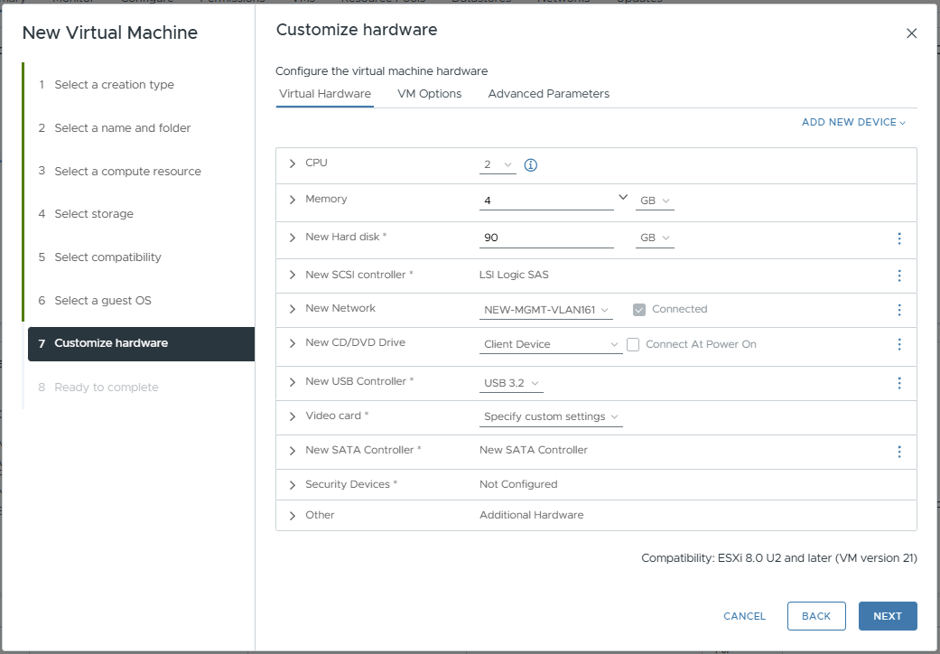
For HOT PLUGS
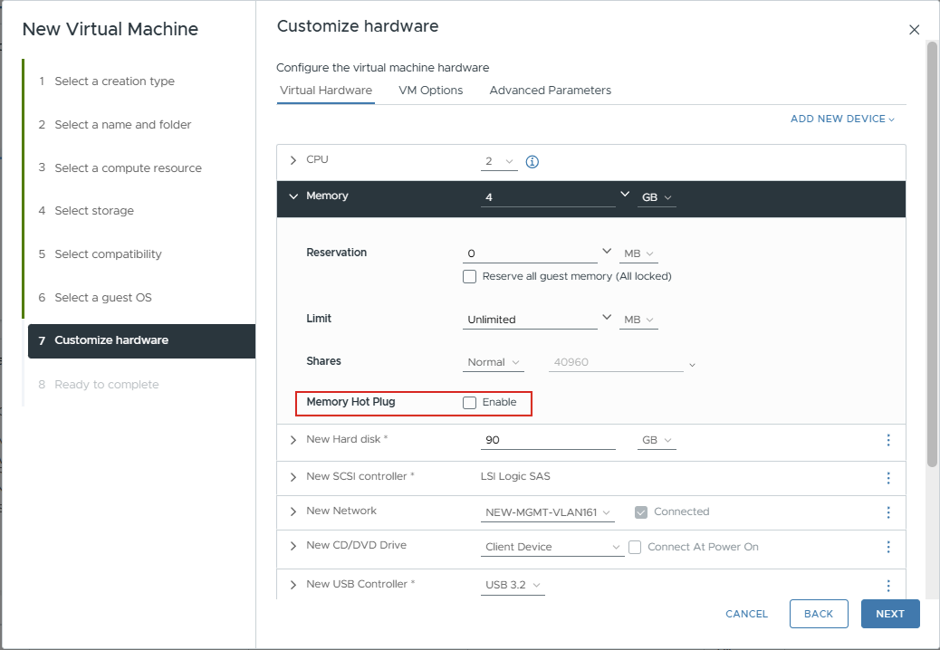
Memory Hot Plug
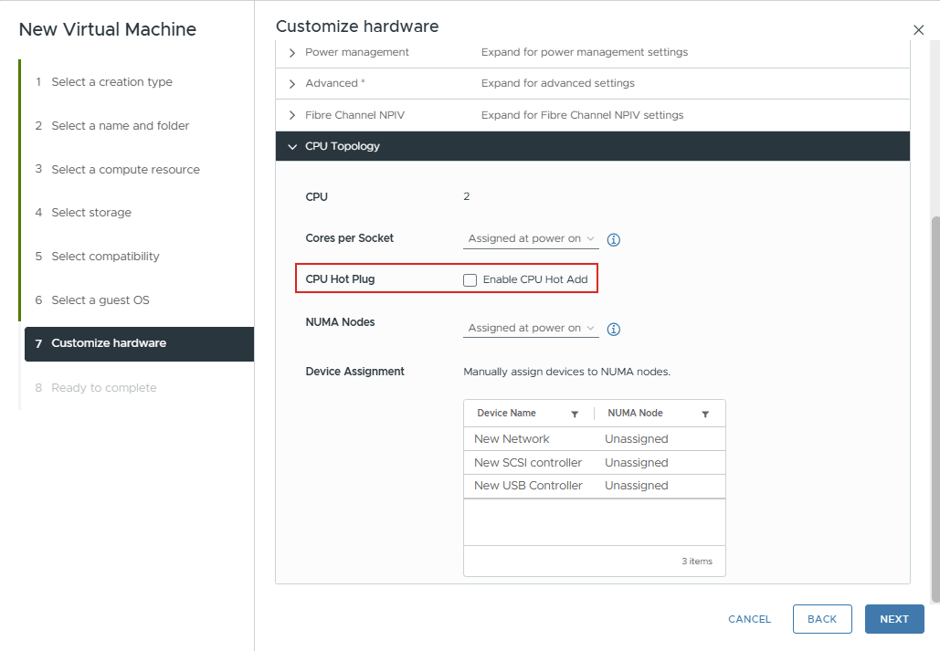
CPU Hot Plug
For Hard Disks
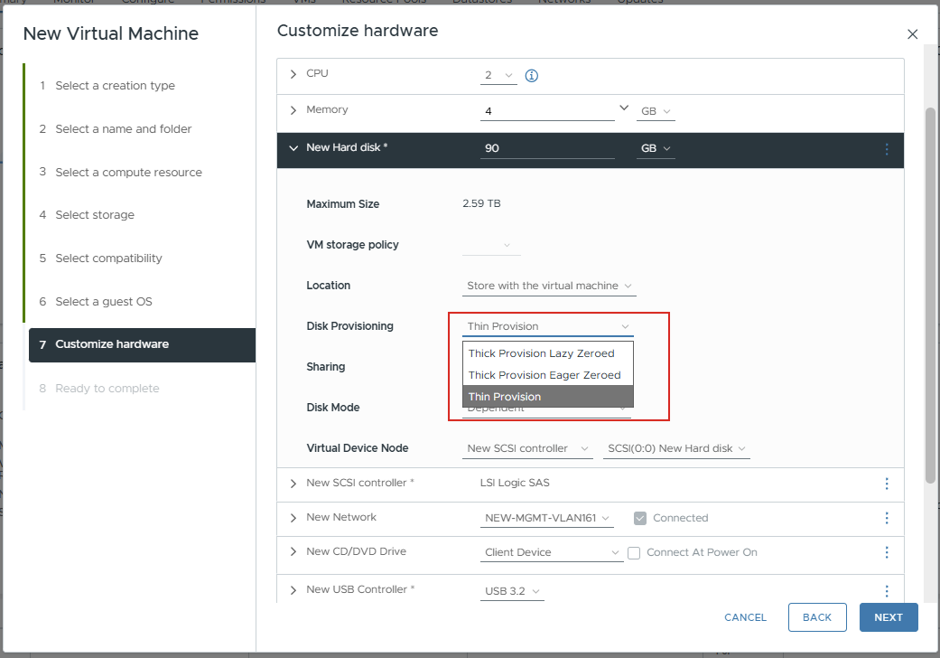
For Network Adapter Type
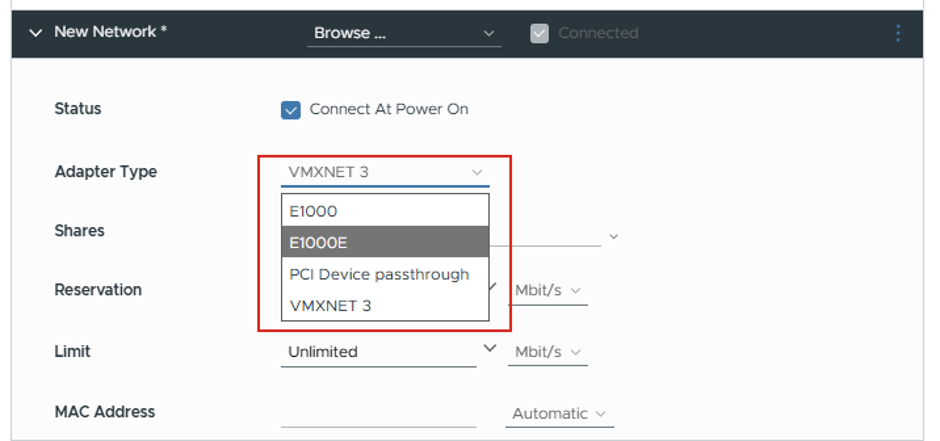
NOTE: The same way of creating a VM is applicable within ESXi/Host Client level as well.
Also, there are features like HOT PLUGS (at Memory & CPU Level), DataStores, Network Adapters Features (containing vStandardSwitch & vDistributedSwitch), which some are explored and some will be discussed later on in details.
2. Using OVA & OVF
All about OVA & OVF
OVF (Open Virtualization Format) is a standardized package format used to distribute and deploy virtual machines across virtualization platforms. An OVF package typically contains multiple files, such as the VM configuration, virtual disk files, and a descriptor file.
OVA (Open Virtual Appliance) is a single-file archive (.ova) that packages the OVF components into one portable file, making it easier to transfer, share, and deploy a VM.
In VMware vSphere, OVA/OVF templates are commonly used for VM migration, software appliance deployment, lab environments, and standardized VM distribution.
Key Difference:
OVF → Multiple files forming a virtual appliance package.
OVA → Single archive containing the OVF package.
Typical Workflow:
Export VM → OVA/OVF Package → Transfer/Share → Deploy OVF Template → Configure VM → Power On
To understand it better, I first created a OVF file by taking an Existing Empty VM (can create a new one using Traditional Method) & installed it with necessary apps/software and modified wallpapers along with some data!
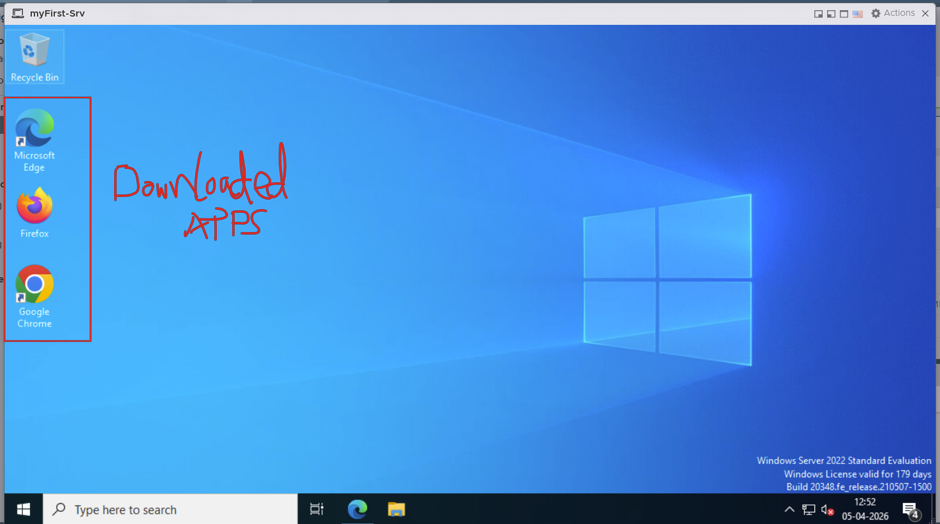
VM is then orderly shutdown.
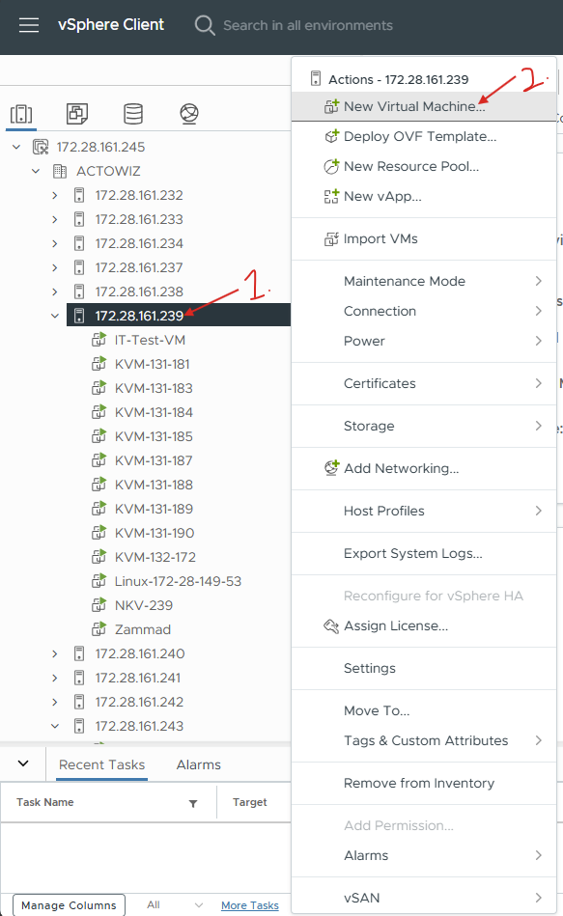
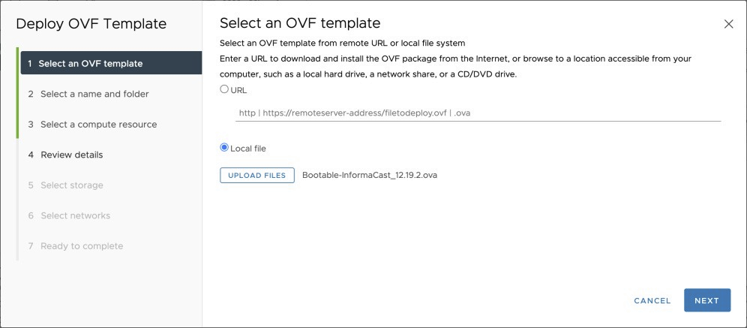
Right click on a Datacenter, Cluster, or ESXi Host; or click on one of the objects, then from the Actions menu select Deploy OVF Template
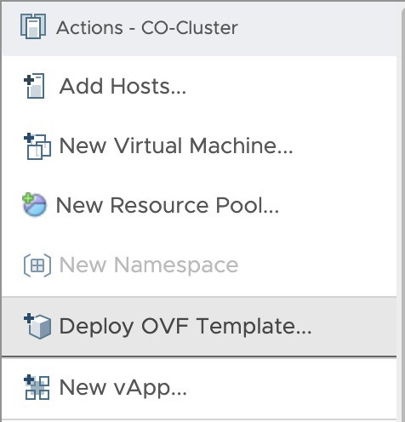
You can then use an URL, or browse for .ova or .ovf/.vmdk files. Once chosen, just follow through the deploy wizard and provide the requested information – VM name, licensing (if needed), storage, network, etc.
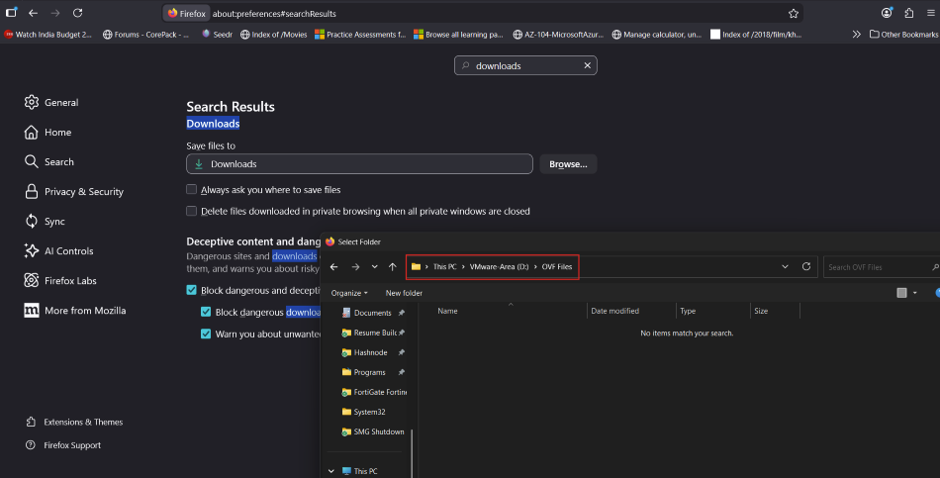
Download PATH changed for my BROWSER.
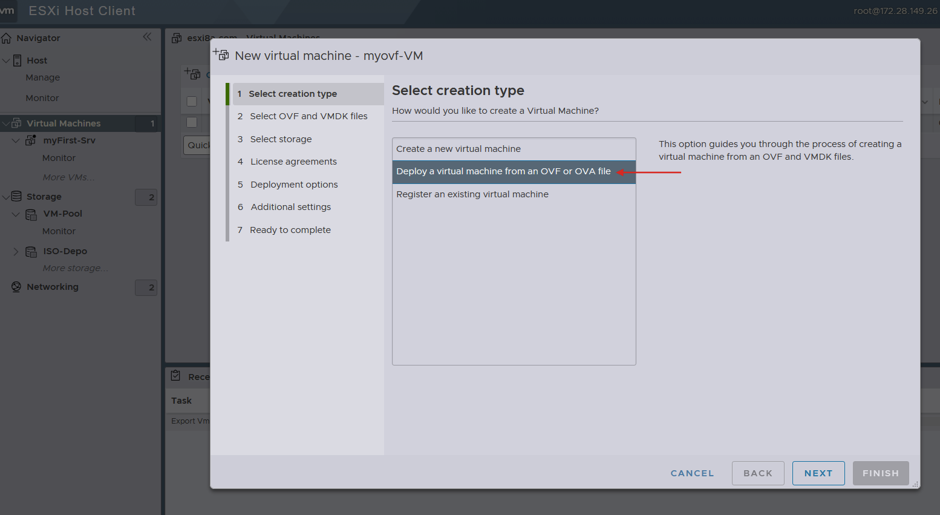
IMPORTING VM from an OVF File:
Create/Register VM Select “Deploy a virtual machine from an OVF or OVA file”.
Select OVF & VMDK Files from Local/Fileshare (wherever its stored).
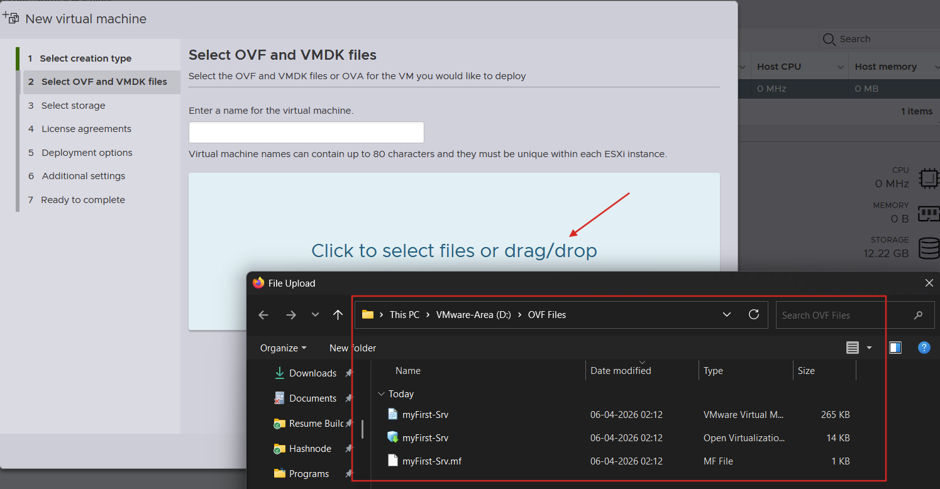
OVA Files containing OVF/BIOS/vDisk are selected and re-created with new VM Name.
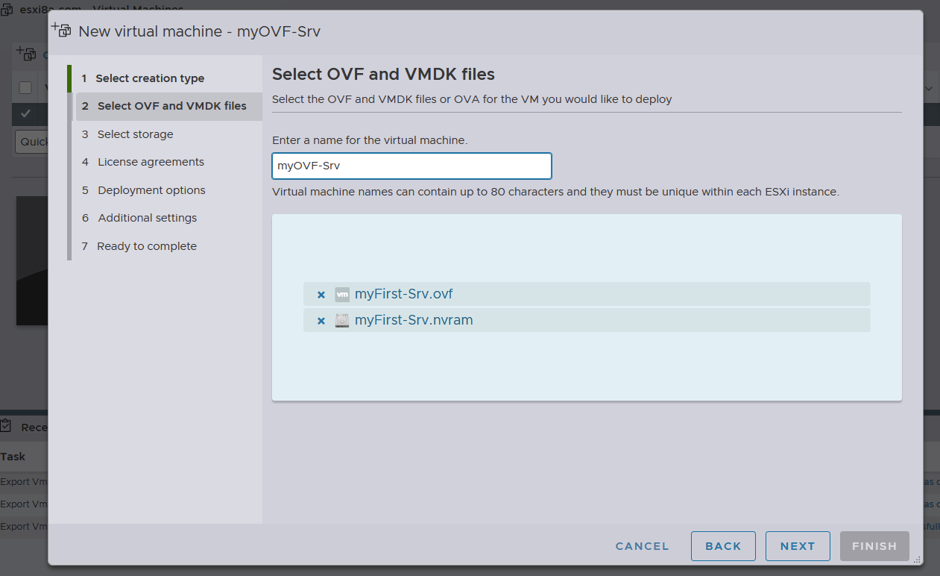
ERROR: Need to ATTACH VMDisk for IMPORTING VM
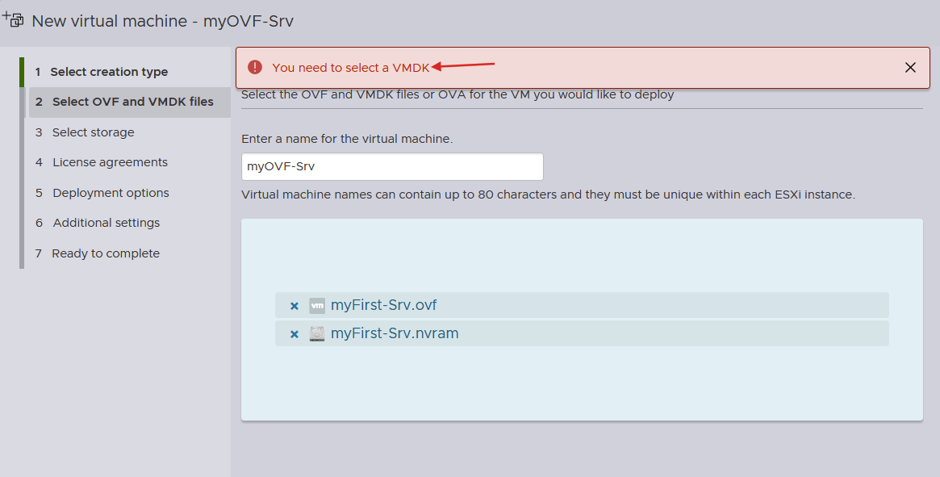
Choosing Exported vDISK File is MANDATORY (. vmdk). Therefore, stopped the LAB here with idea to perform this!
Followup ERROR: DISKS are not visible in Windows Server 2016 VM when configured within ESXi with default settings-
DISK TYPE: Thin Provisioning SCSI Controller: VMware Paravirtual
Sol.
This is a very common issue in VMware ESXi when installing Windows Server 2016 — and the screenshot already tells us the exact root cause:
“We couldn’t find any drives. To get a storage driver, click Load driver.” 🔍
🔍Why this happens
Inside ESXi, your VM’s virtual disk is attached via a SCSI controller, but:
Windows setup doesn’t have the driver for that controller. OR
the controller type is incompatible with the installer.
✅ Most likely causes (based on your past setup)
Since earlier you mentioned using VMware Paravirtual (PVSCSI), that’s the #1 reason.
👉 PVSCSI driver is NOT included in Windows Server 2016 ISO by default
FIX1: Change SCSI Controller
This is the simplest and most reliable fix.
Power OFF VM
Go to VM Settings
Change SCSI Controller to: 👉 LSI Logic SAS (Best for compatibility)
Save → Start installation again
✅ Disk will appear instantly
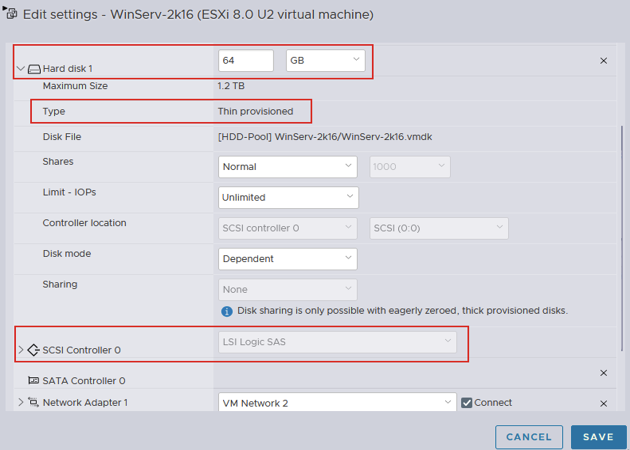
RESULT
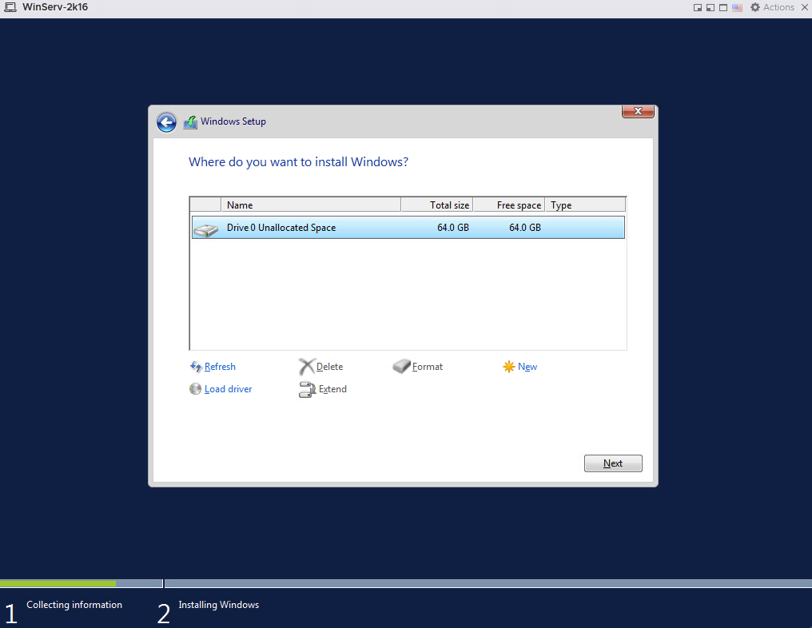
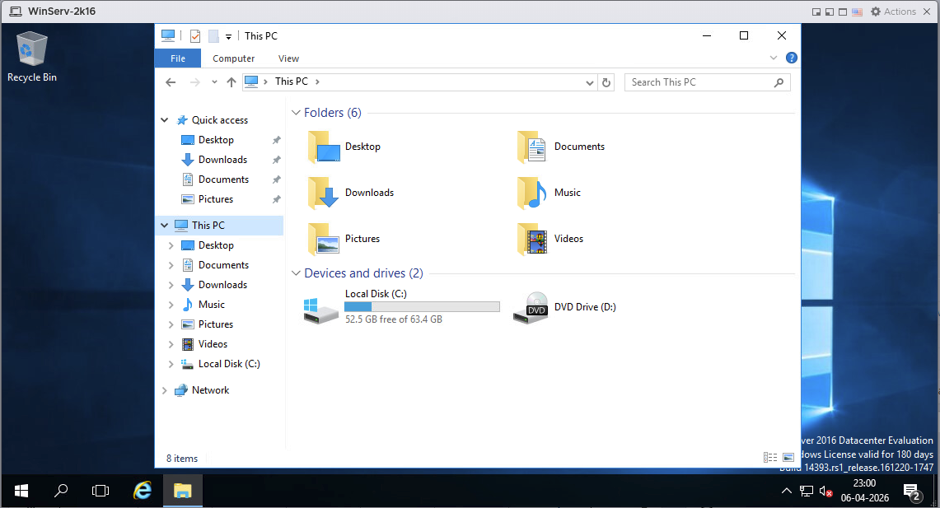
IT WORKED!
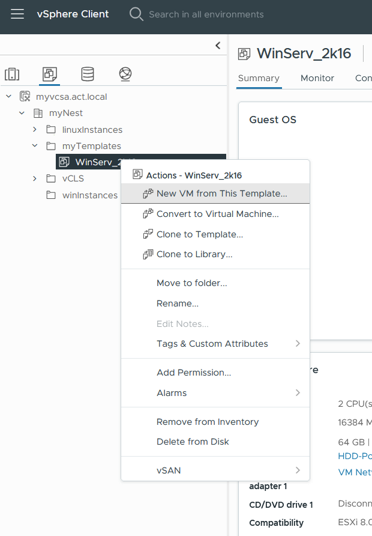
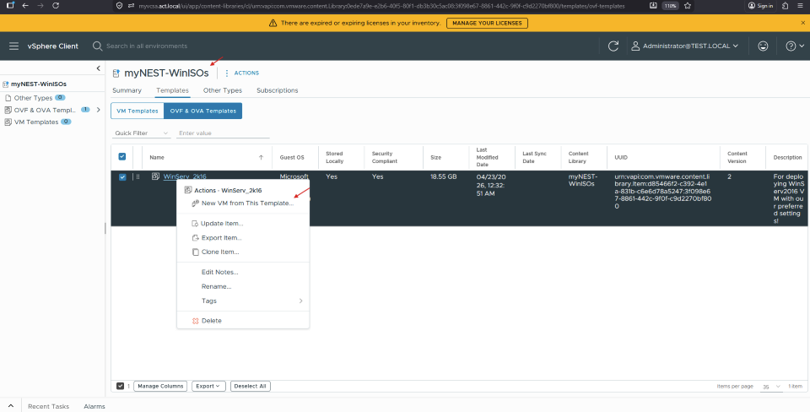
Whether a Template or OVF files are in your vSphere environment, or vSphere Content Library, deploying is virtually the same, except where you deploy it from. You simply rt-click on the Template and choose New VM From This Template. As with any new VM, just provide the necessary information, and configure resources (vCPUs, memory, disk, network, etc) as needed
2. Using Standard Template
A VMware Standard VM Template is a master copy of a virtual machine that has been prepared with a standardized operating system, configurations, applications, security settings, and required updates.
Instead of creating and configuring every VM from scratch, administrators can use the template to quickly deploy consistent VMs across the vSphere environment.
A typical template may include:
Standard OS installation and patches
VMware Tools
Network and security configurations
Required applications or agents
Organizational hardening and baseline settings
Once created, the template is kept as a golden image. When a new VM is required, administrators can clone or deploy a VM from this standardized template.
Therefore, I created a Template acting as a Gold Image with OS Level Customization.
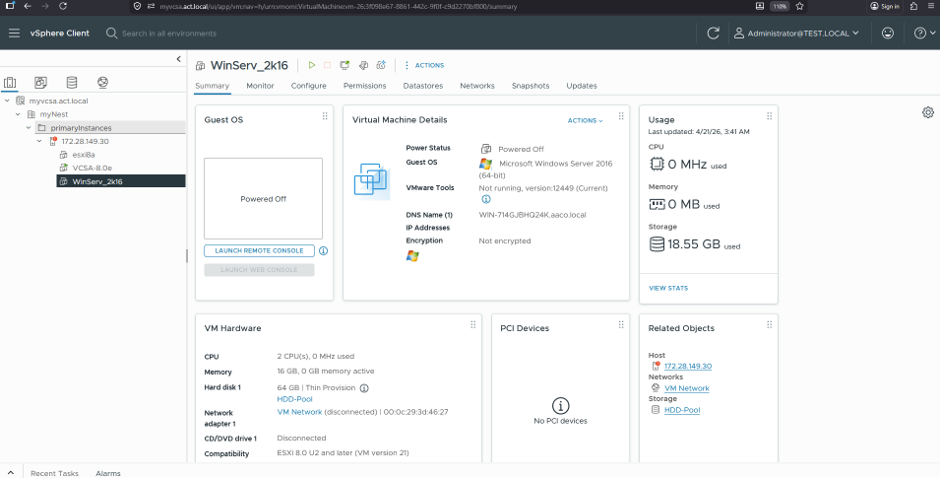
A VM configured with OS: Windows Server 2016. It is with ‘sysprep’ – OOBE!
Converting into TEMPLATE
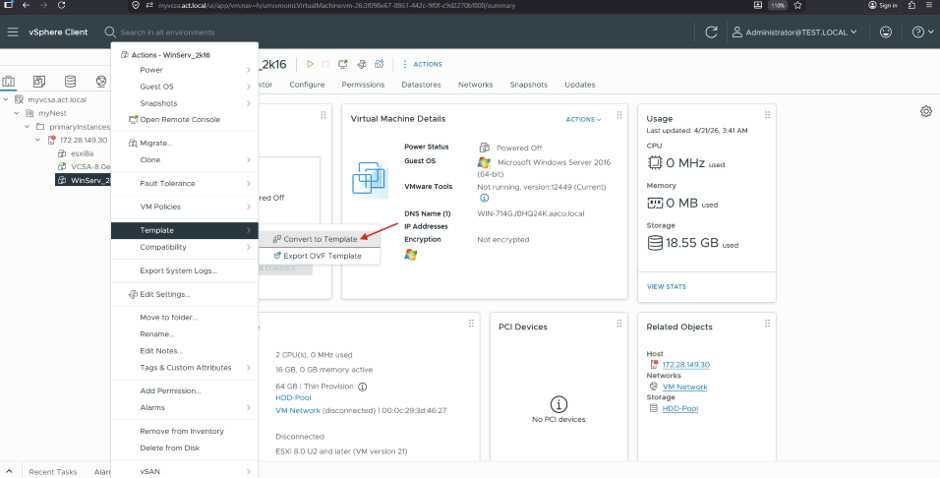
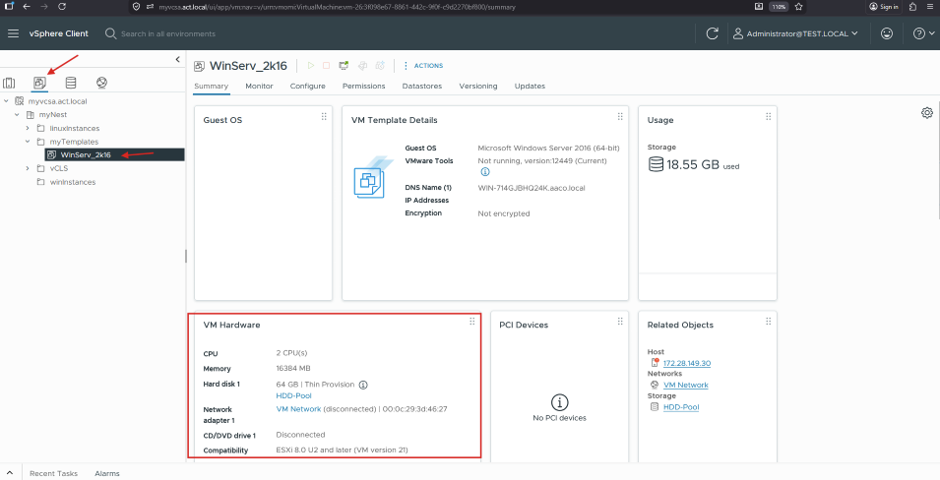
Before, jumping ahead to create a VM out of it. It is vital that we understand the level of customization that can be performed involved within the template.
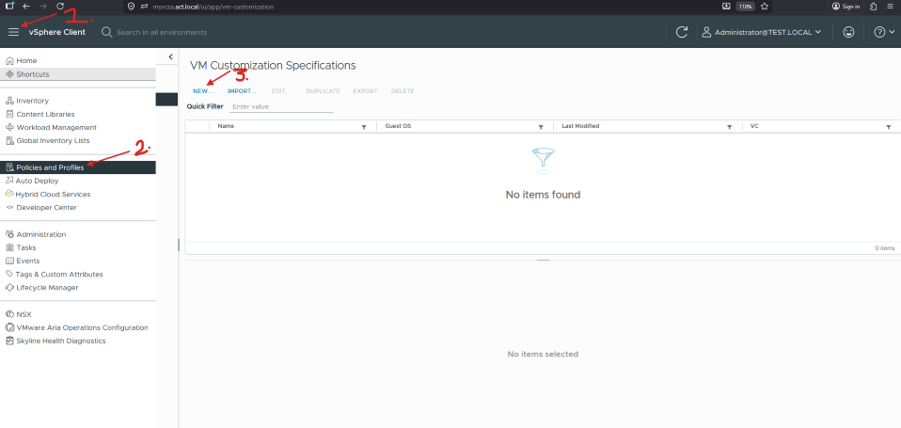
This is where Policies & Profiles comes into the picture!
3. All about Policies & Profiles
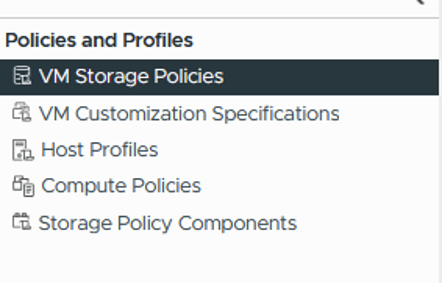
VM Storage Policies
Define how a VM's virtual disks should be placed and managed on storage. They can specify requirements such as performance, availability, encryption, and storage capabilities, helping ensure VMs are deployed according to organizational storage requirements.
VM Customization Specifications
Predefined settings used when deploying or cloning VMs to automatically customize the guest OS. They can configure hostname, IP/network settings, domain membership, SID, timezone, and other OS-specific parameters.
Host Profiles
Capture the configuration of an ESXi host as a baseline/template and allow administrators to apply or validate that configuration across multiple hosts. Useful for standardization, compliance, and reducing configuration drift.
Compute Policies
Define rules that control VM placement and compute behavior within the vSphere environment. They can be used to influence where VMs run based on requirements such as host groups, clusters, or specific infrastructure characteristics.
Storage Policy Components
Reusable building blocks containing individual storage requirements/capabilities that can be incorporated into VM Storage Policies. They help administrators create modular and consistent storage policies instead of defining every requirement repeatedly.
For my activity, Relying on VM Customization Specifications for my TEMPLATE was a vital option to experience the OS customization within my VM!
MY Initial PLAN
To create a Policy/Profile with OS customization set with my preferred credentials, Domain Join (which later backfired), Timezone (set with IST), Custom System Names with Series of Numbers appended with every NEW VMs & additonal Networks (if required).
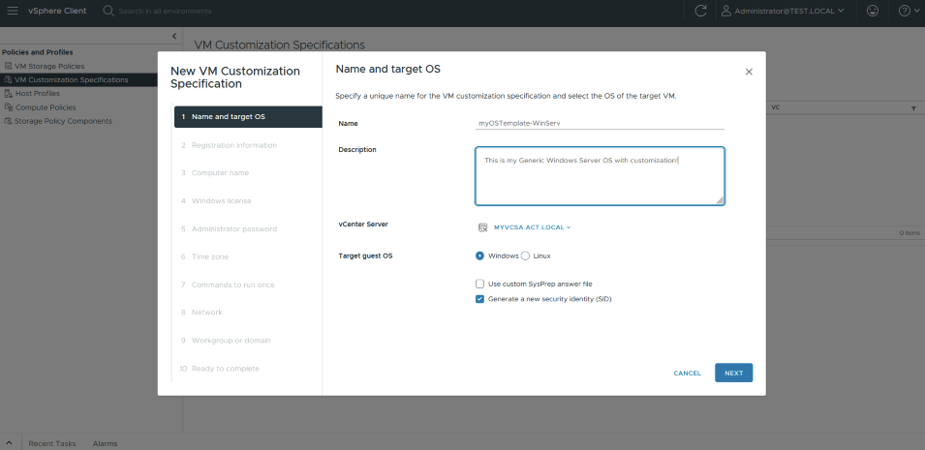
Use custom sysprep:
NOTE:
When choosing “Use custom SysPrep answer file”. We get these different set of specifications.
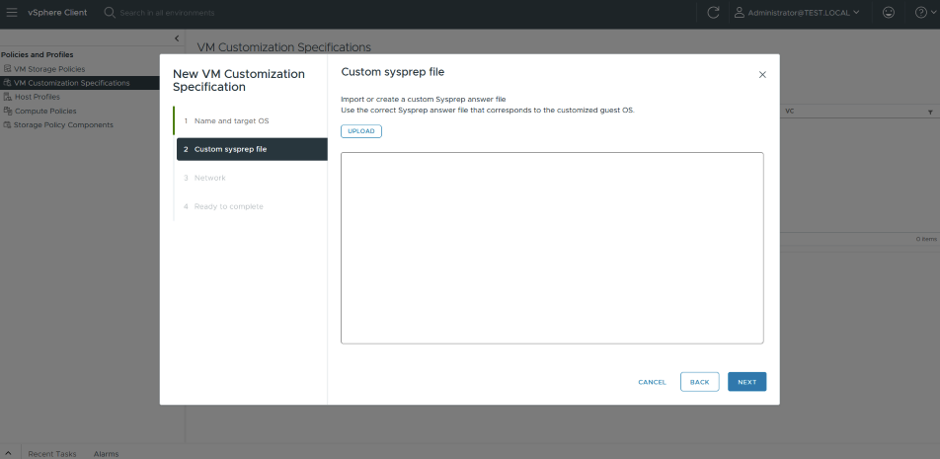
Registration Information:
For now, I UNTICKED the sysprep option
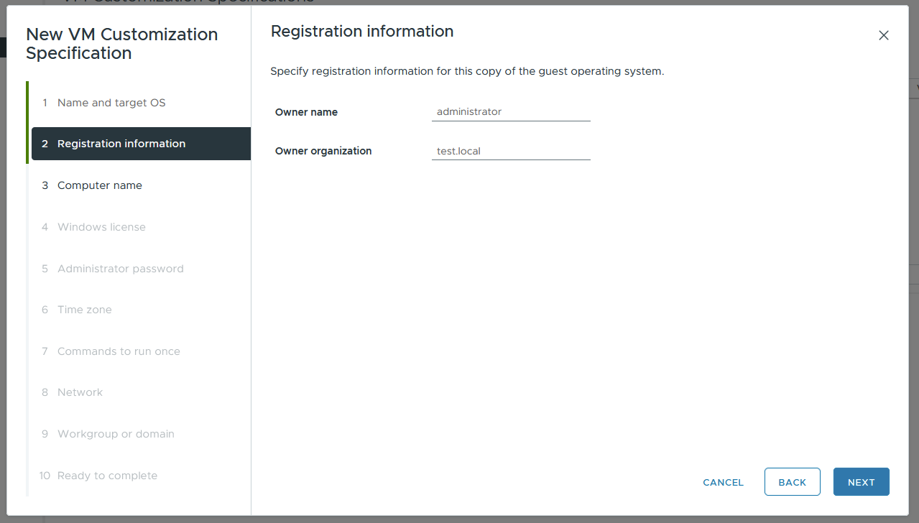
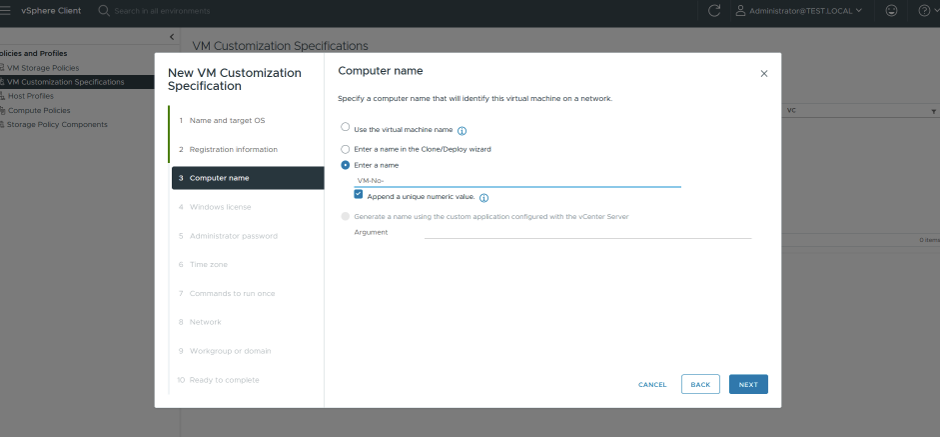
VM Name Customization:
Trying with NAMING SCHEME as below
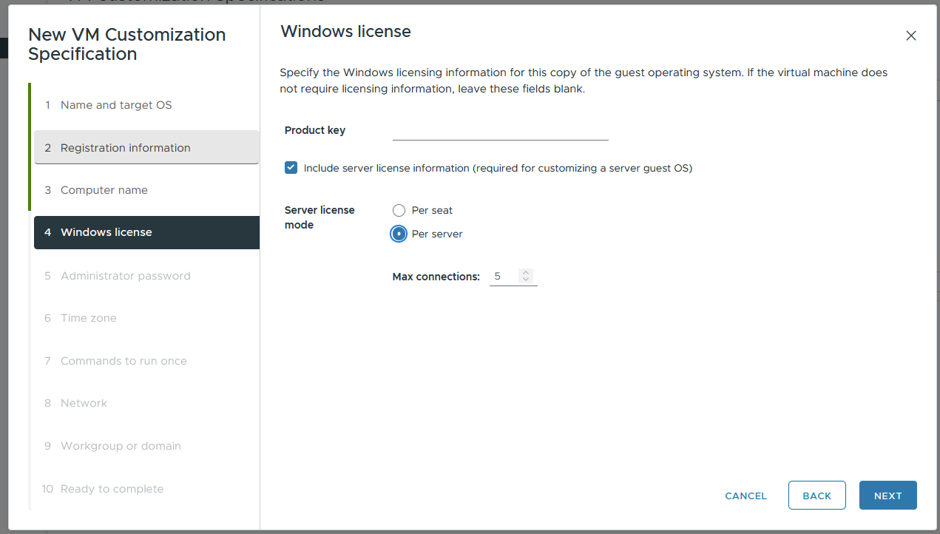
Windows Licence:
Went with DEFAULT option for Windows Licence:
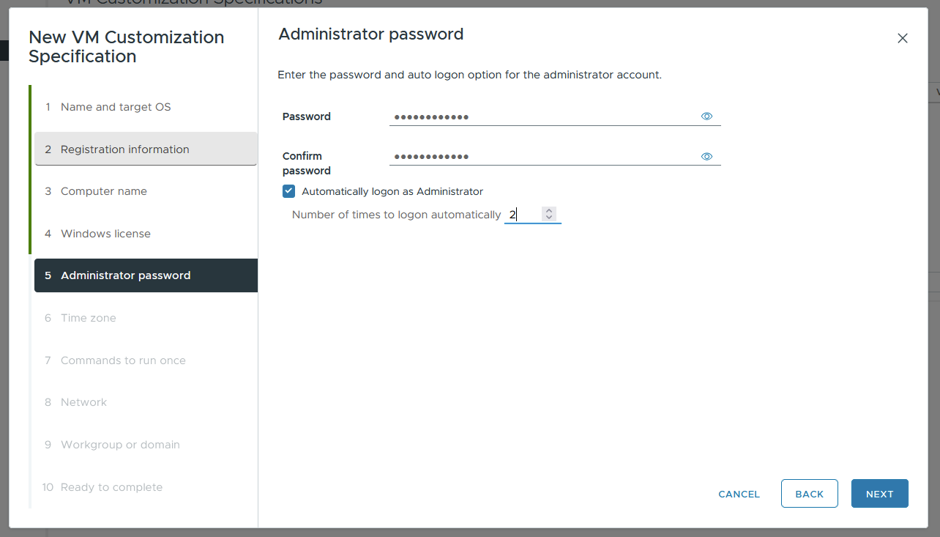
Administrator Password:
Went with these custom Administrator Password
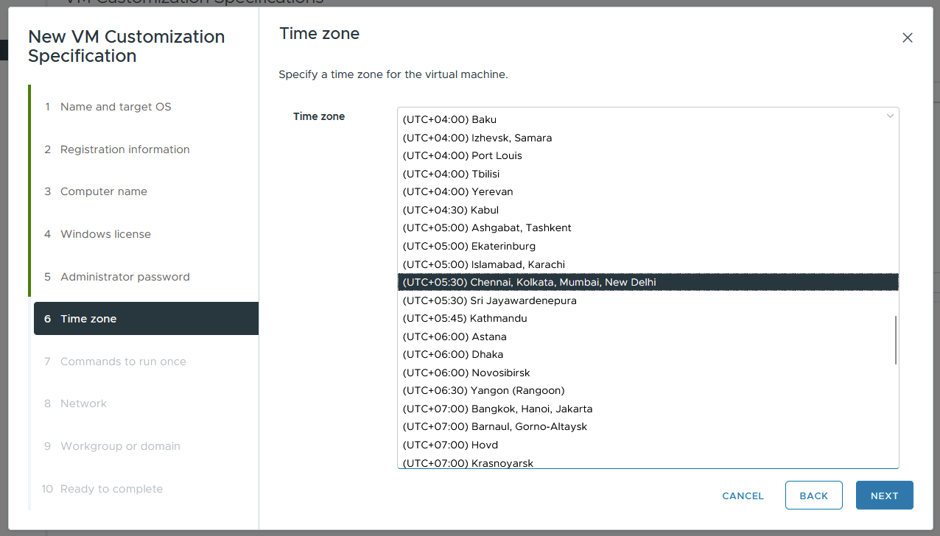
Time Zone:
Specified IST
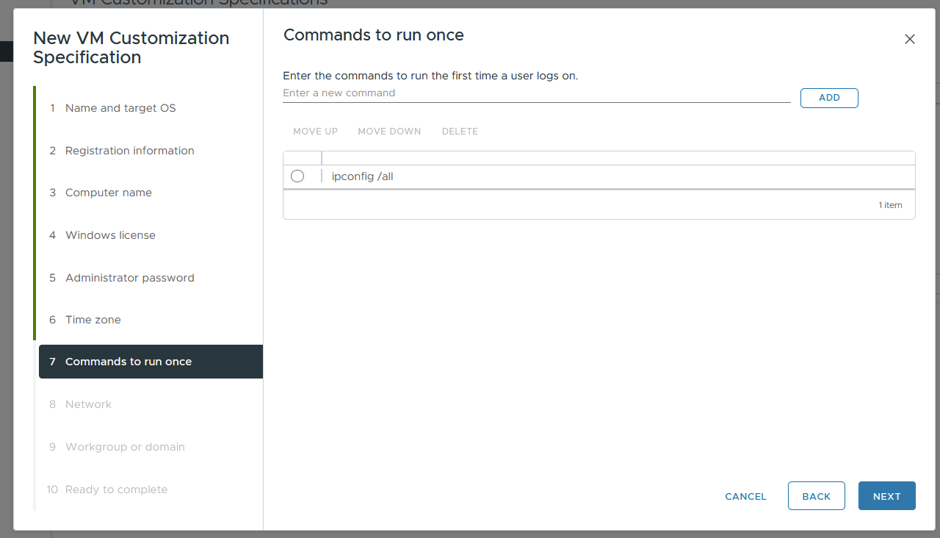
Commands to run once:
For TESTING purpose, specified a command – “ipconfig /all”
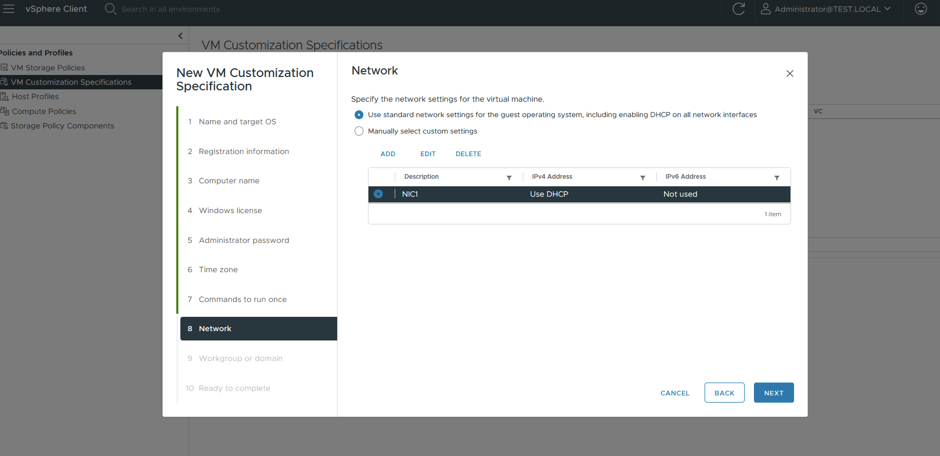
Network:
Went with defaults
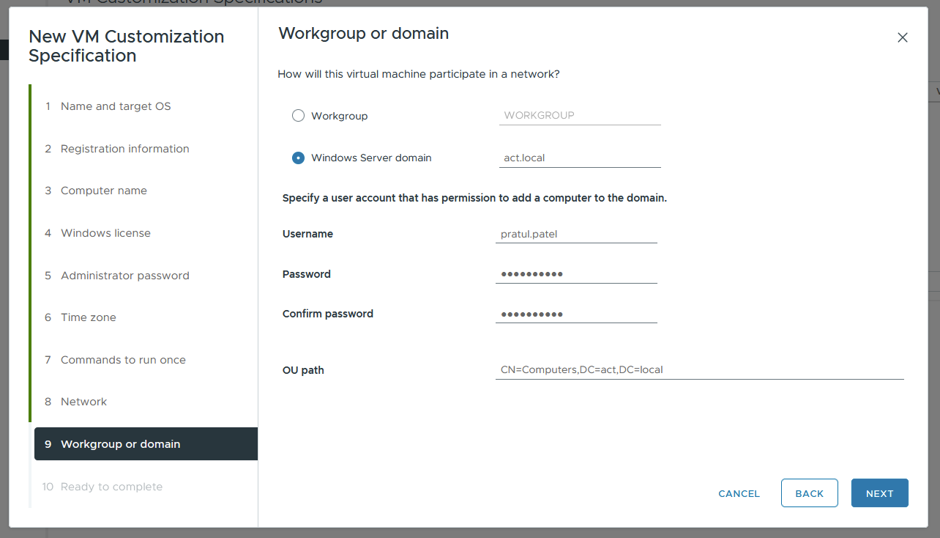
Workgroup or Domain:
For TEST purpose, I gave my org AD with OU path
OVERVIEW
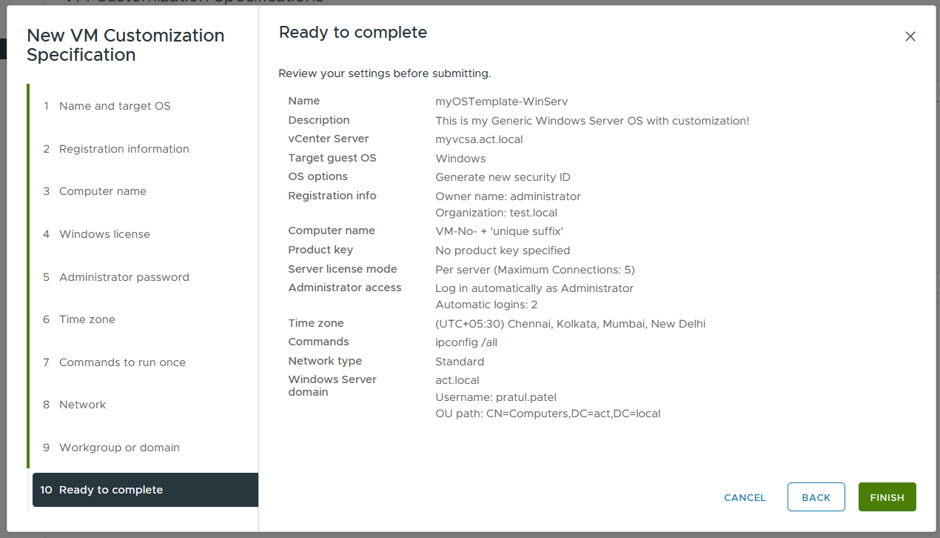
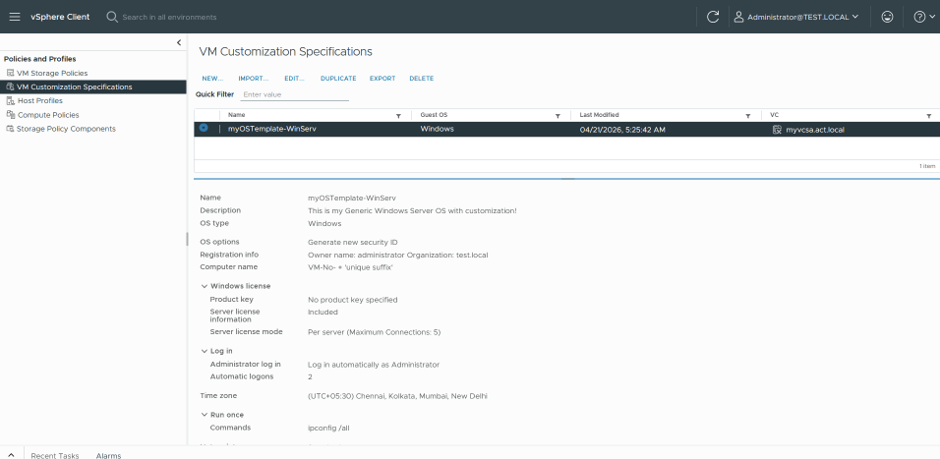
Created VM Customization Specifications with Name - "myOSTemplate-WinServ".
To test out, I performed the creation of a VM from this very TEMPLATE (having OS Customizations) within it using,
OR
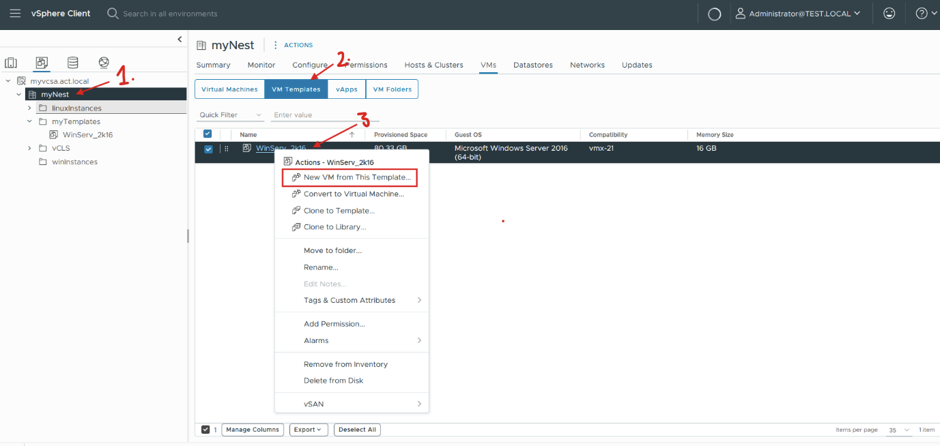
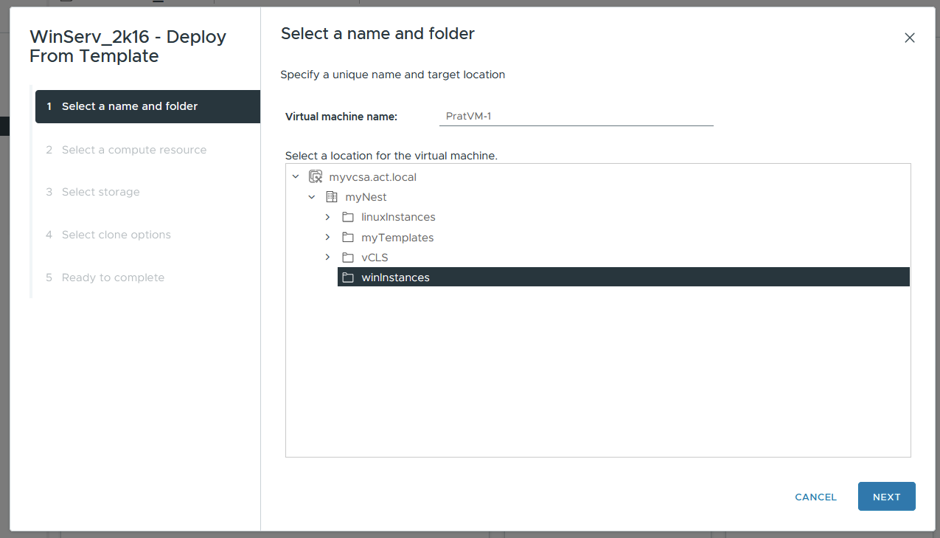
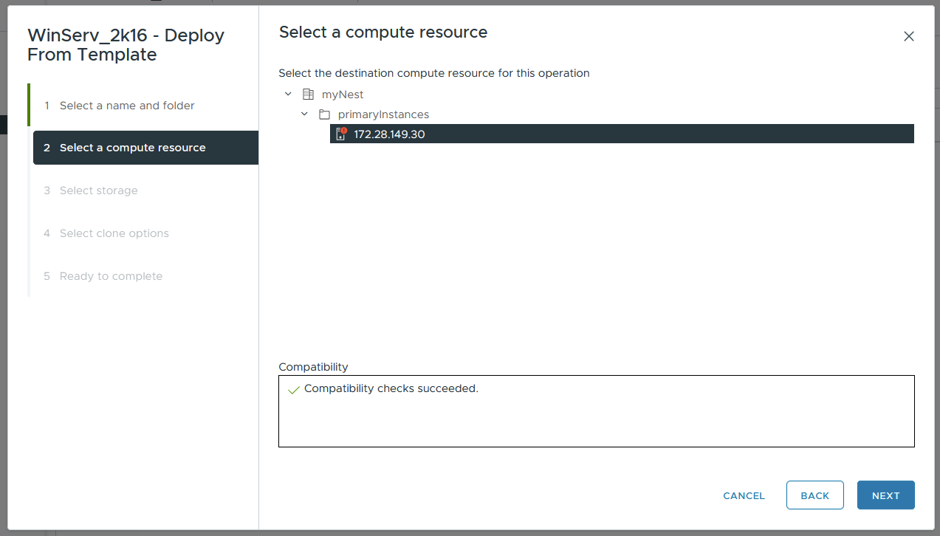
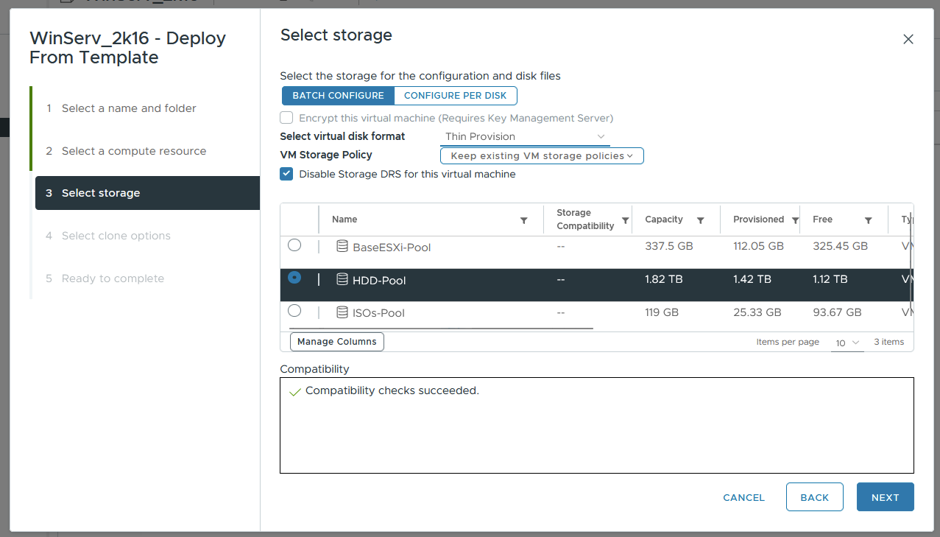
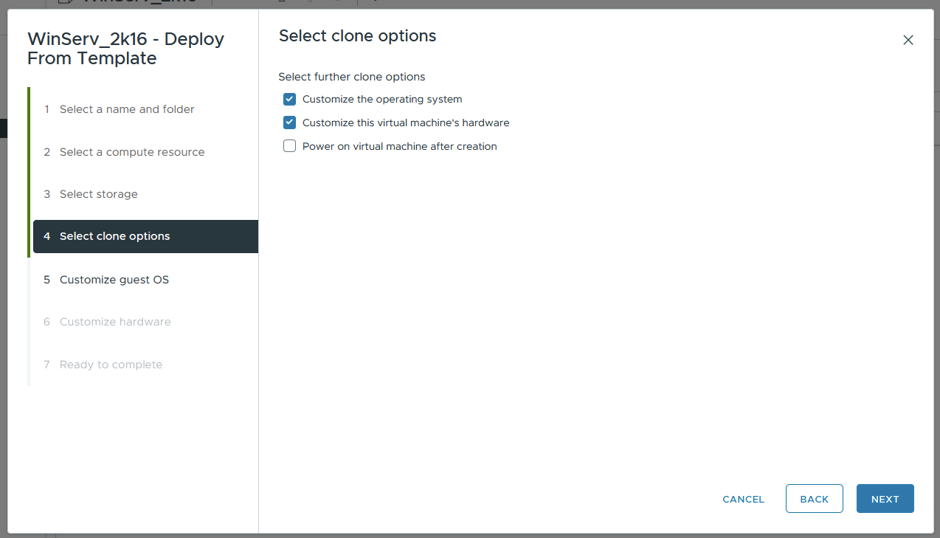
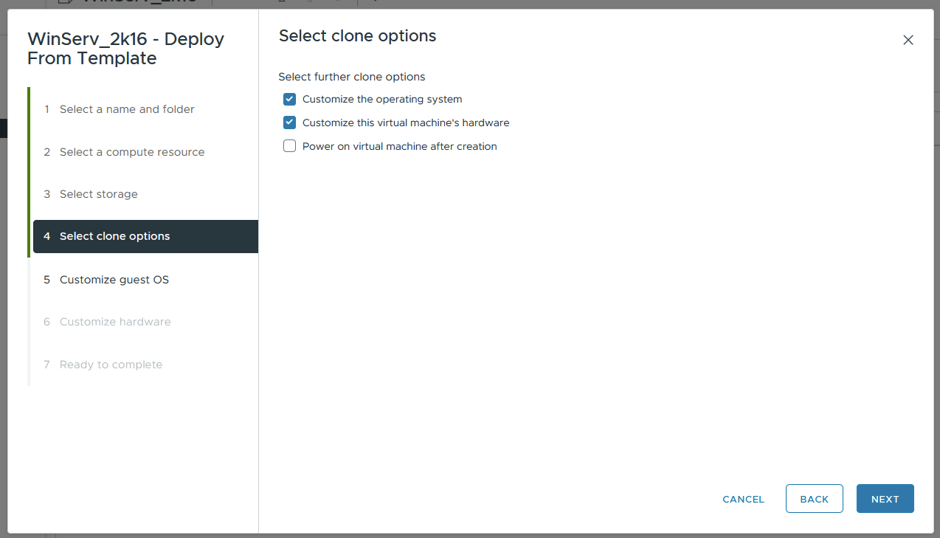
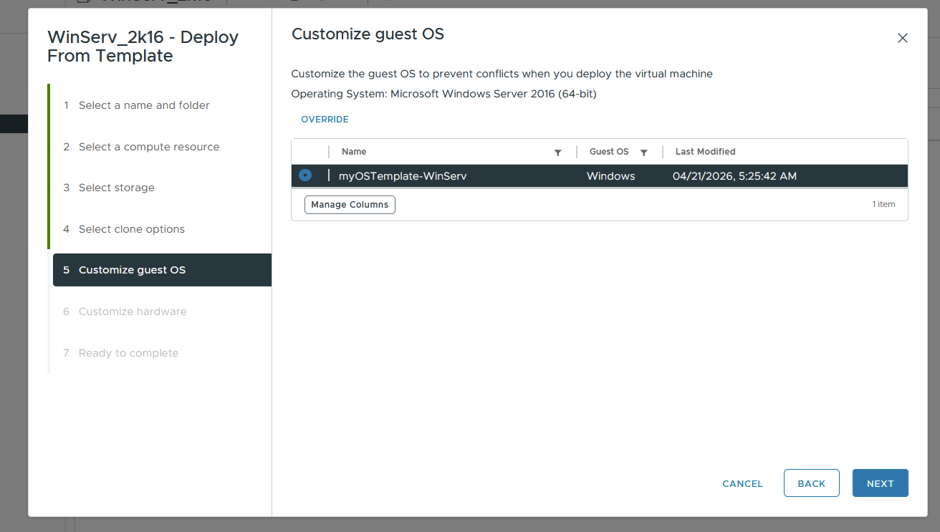
This is where we APPLY our customized OS, which were configured in “Policies & Profiles” in first place.
Note: We can also OVERRIDE it!
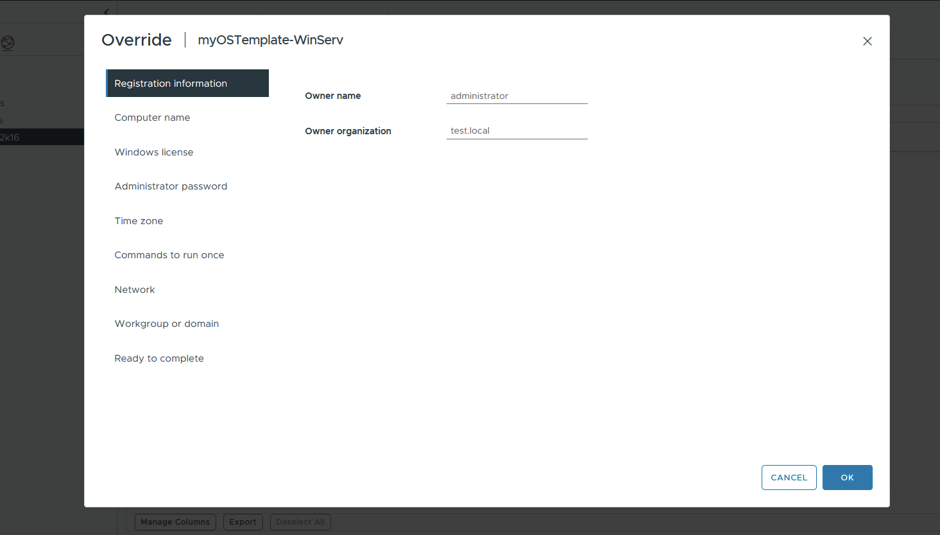
But for now, going with DEFAULT option.
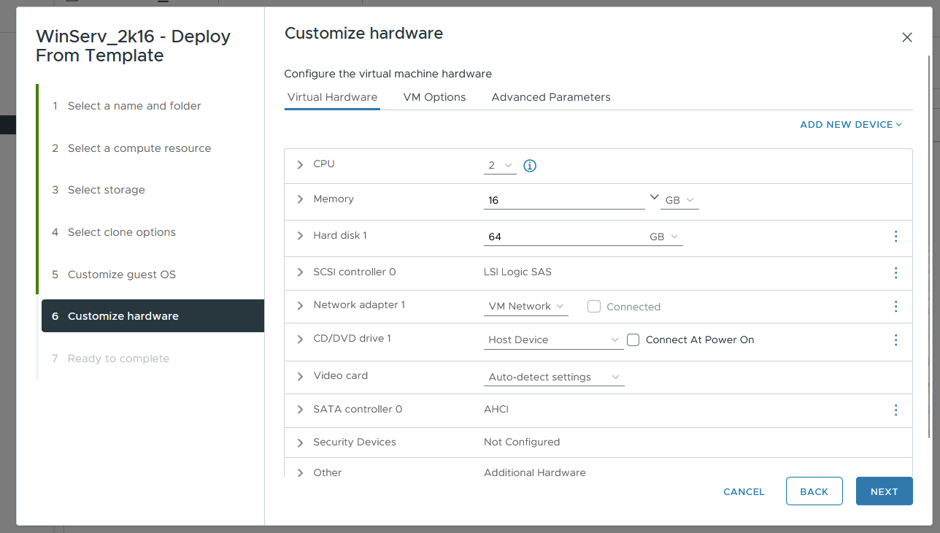
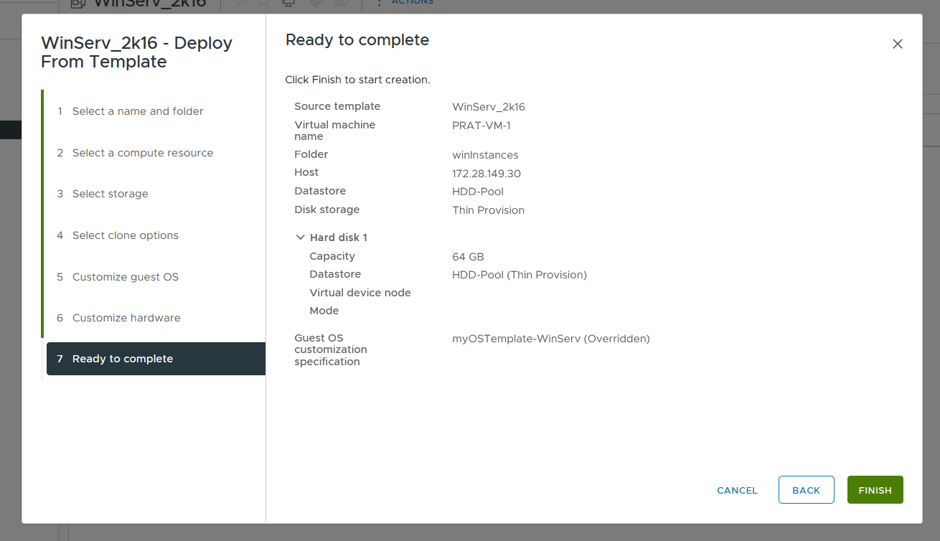
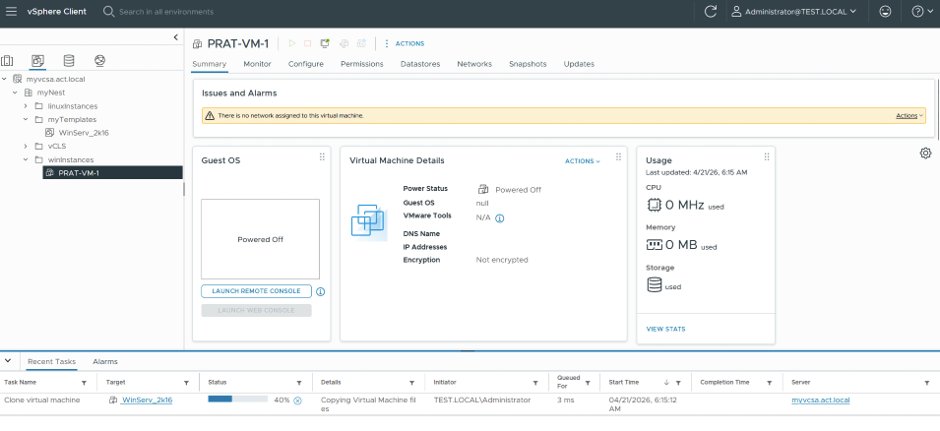
VM creation in progress:
ERROR: my osTemplate NOT GETTING applied!
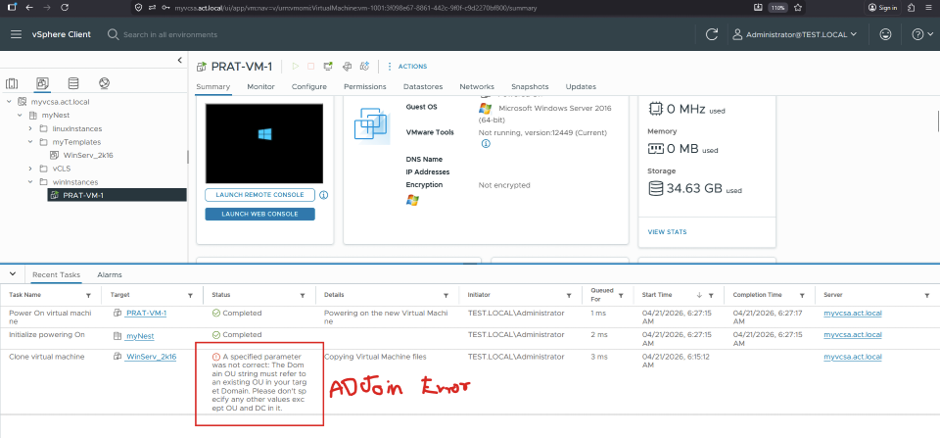
Due to this ERROR, my osTemplate didn’t get applied!
Sol.
I re-tried again with my osTemplate without using AD Join customization by using OVERRIDE option.
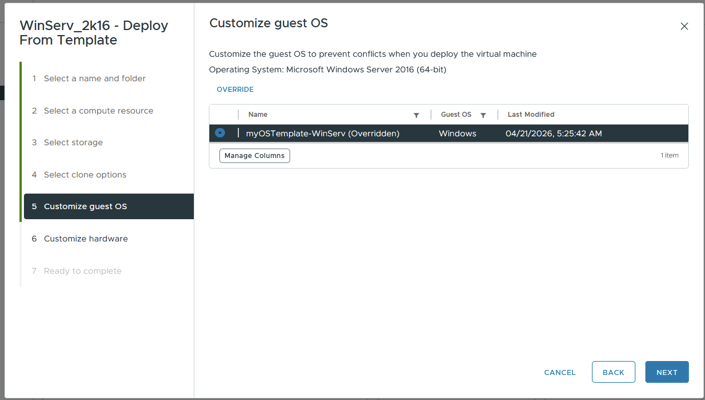
This time it WORKS!
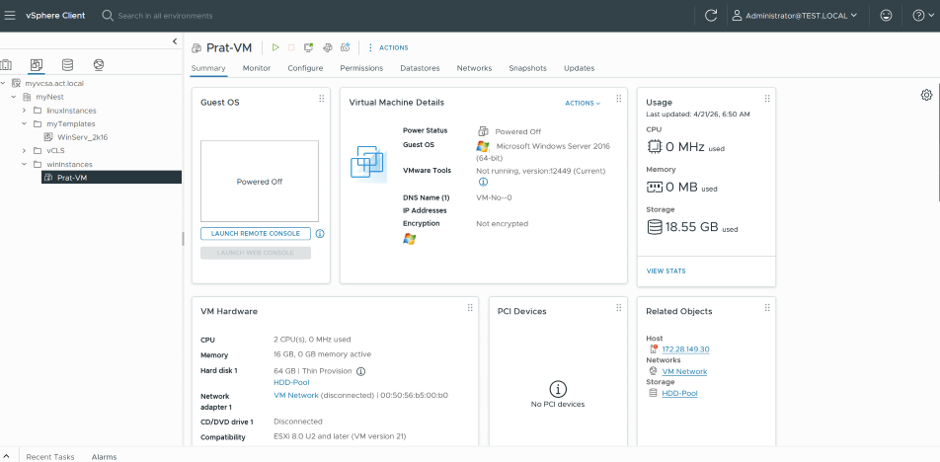
Also the VM took the CREDENTIALS as defined in osTemplate:
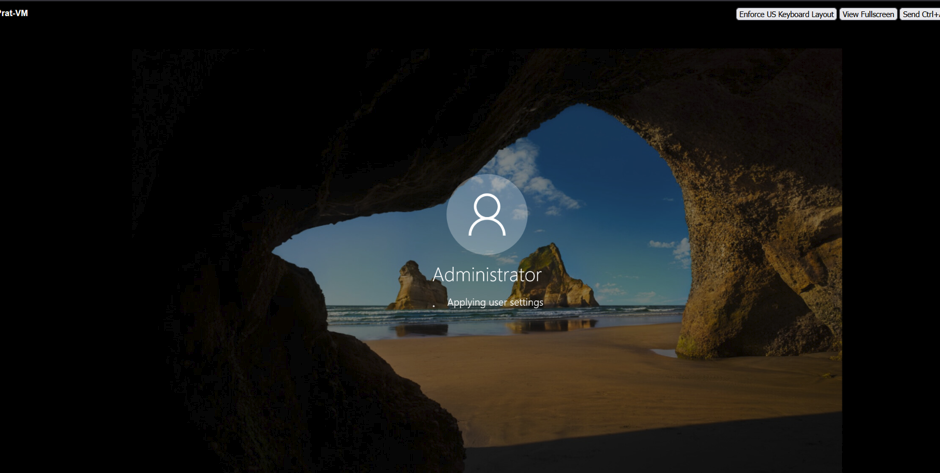
I got below VM Displays:
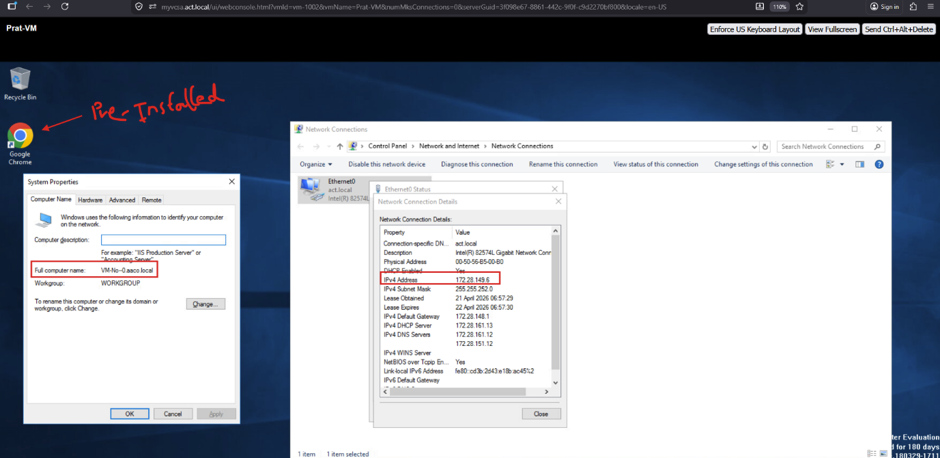
OS Name: VM-No—0
VM Name: Prat-VM
Also the VM took the CREDENTIALS as defined in "osTemplate".
RESULT
4. Using Content Libraries
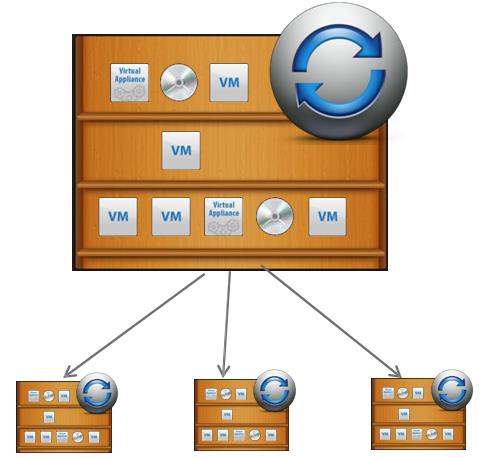
vSphere Content Library was introduced into the VMware suite back in version 6.0. Since then, VMware has made some significant changes and enhancements to this feature. With the latest vSphere version, the Content Library has matured and offers some new ways of working with your VMs, templates, and external files, such as OVF or ISO files.
All these files can be shared within your organization or outside of your organization. The access to content libraries can be password protected. The transfer service on the vCenter Server manages the import and export of content between the subscriber and the publisher libraries. It uses HTTP NFC protocol.
When you enable authentication for the Content Library, you basically set a password on the static username, which you cannot change. This user account, is not associated with vCenter Single Sign-On or Active Directory.
The idea is to have an efficient, centralized method to manage important data required in a vSphere environment.
NOTE: It is possible to edit items only in a local library, no matter whether it is published or not. Library items in subscribed libraries cannot be modified.
About Local Library
Local Library is used to store items in a single vCenter Server. You can publish them so other vCenter Server users can subscribe to them, as well as configure a password for authentication to the Library. A caveat is if you have a VM template in the Local Library, you cannot publish it.
🔄 Real-world use case:
You build a Golden VM Template (e.g., Ubuntu/Windows)
Store it in the Local Library
Use it repeatedly to deploy VMs quickly
🌍 Advanced usage:
If you enable:
Publishing → other vCenters can subscribe to your library
Authentication → secure access control
👉 Think of it like:
- “Your private Git repository for VM templates”
About Subscribed Library
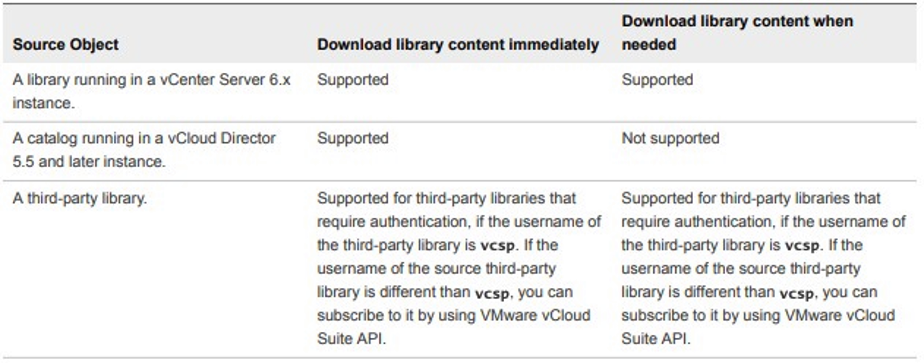
Subscribed Library is a library you create when you subscribe to a published library. The Subscribed Library can be created in the same or remote vCenter than the published library. When creating a Subscribed Library, you can choose to immediately download the full contents of the library upon creation, or download only the published library metadata and later download the full content of the library. Keep in mind, when using a Subscribed Library, you can only use the library content, not add items to it.
The use of subscriptions allows content distribution between a publisher and a subscriber in some scenarios. We can consider the following:
The publisher and subscriber are in the same vCenter Server instance.
The publisher and subscriber are in vCenter Server instances that are in Enhanced Linked mode.
The publisher and subscriber are in vCenter Server instances that are in Hybrid Linked mode.
⚙️ Key Features:
Requires a Subscription URL
You cannot upload directly to it
Content comes from a publisher (Local Library)
Supports automatic synchronization
To make it use most out of it, I created
a Local Content Library
a Subscribed Content Library
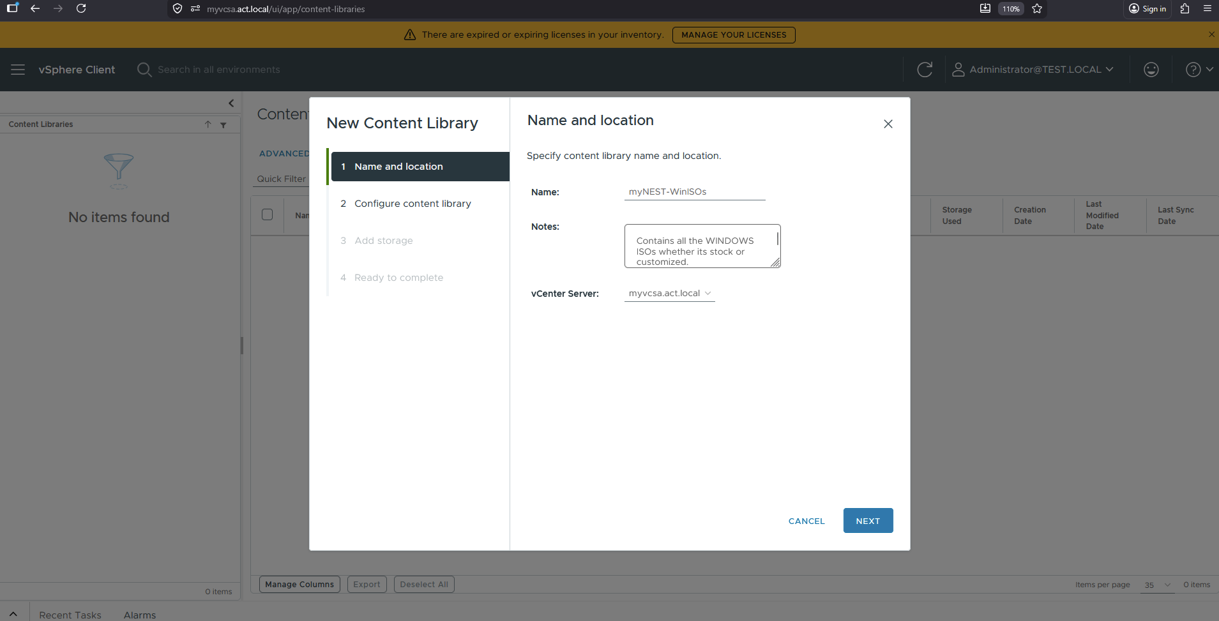
Enabling Publishing
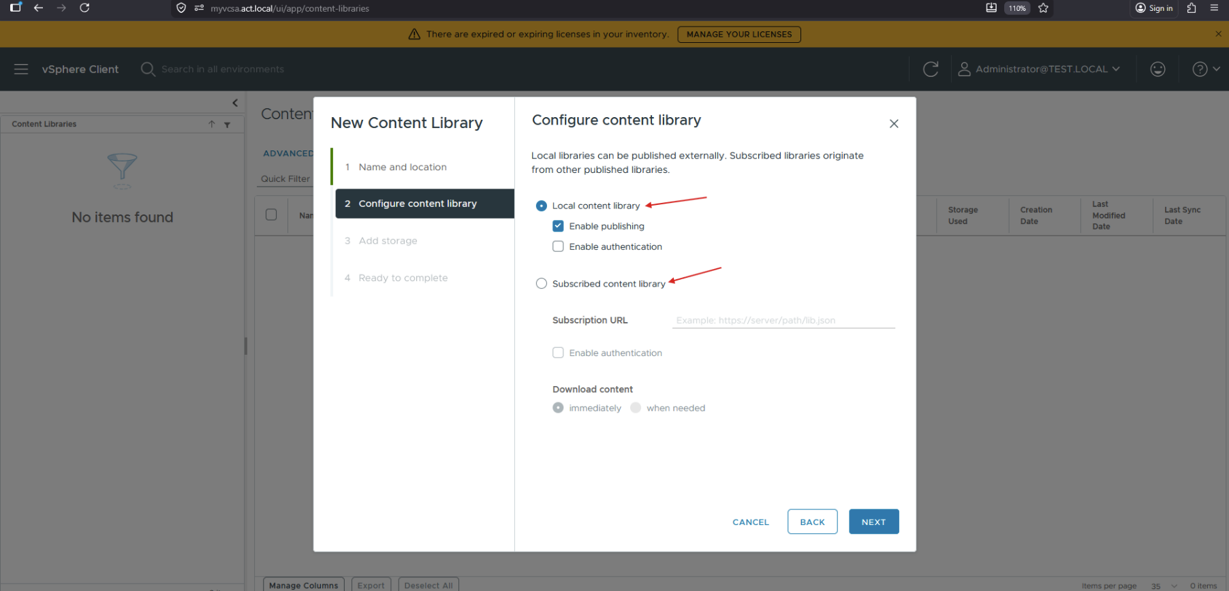
NOTE: The Enable Authentication feature enables the password authentication thing!
Add Storage went with ISOs-Pool which is linked to BASE-ESXi Host!
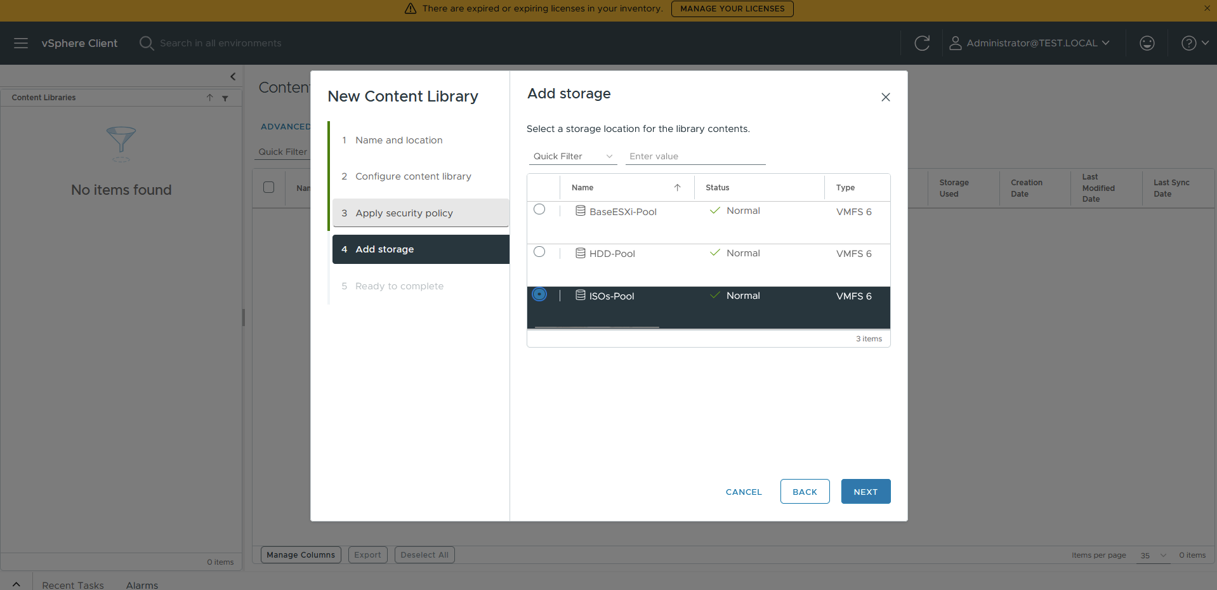
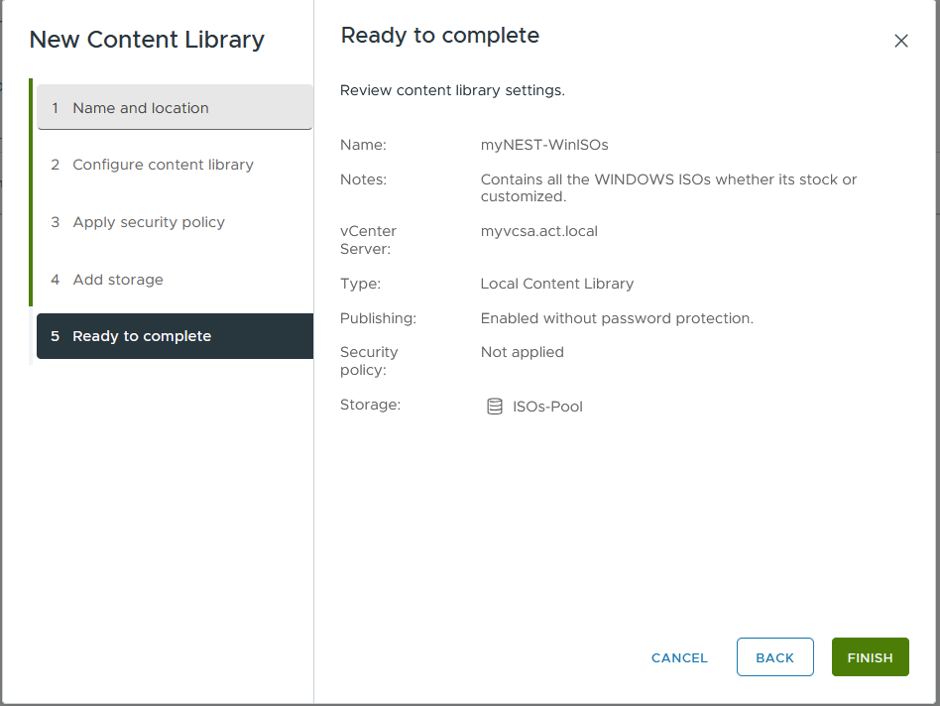
NOTE: Even though my DataStore: ISOs-Pool contained ISOs already! It didn’t reflect in my Content Library as configured
Security Policy Went with DEFAULT settings
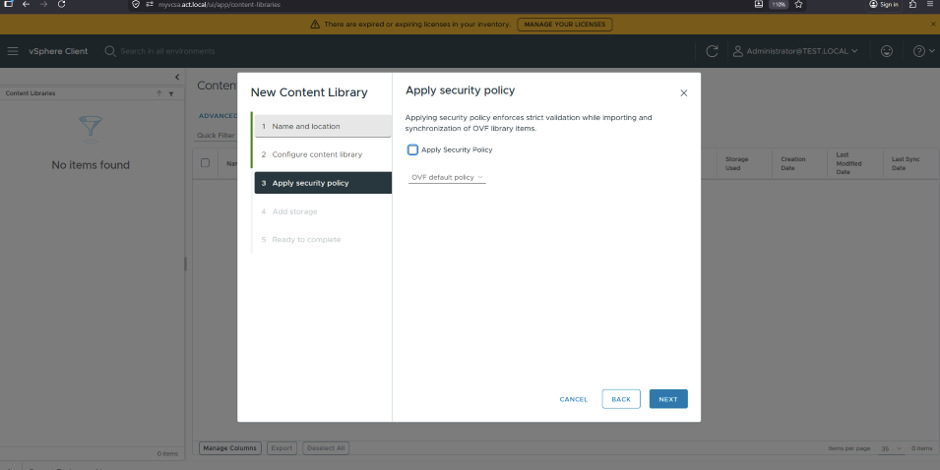
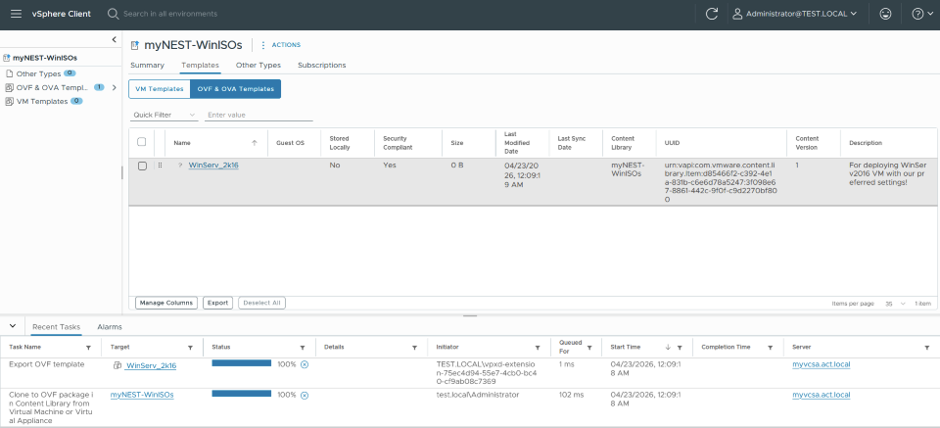
I successfully created a Content Library. Now to test out by importing a Template into it and apply versioning into it, which will make more sense once we proceed with hands-on!
Moving an EXISTING TEMPLATE to CONTENT LIBRARY
Choose --> “Clone to Library” option
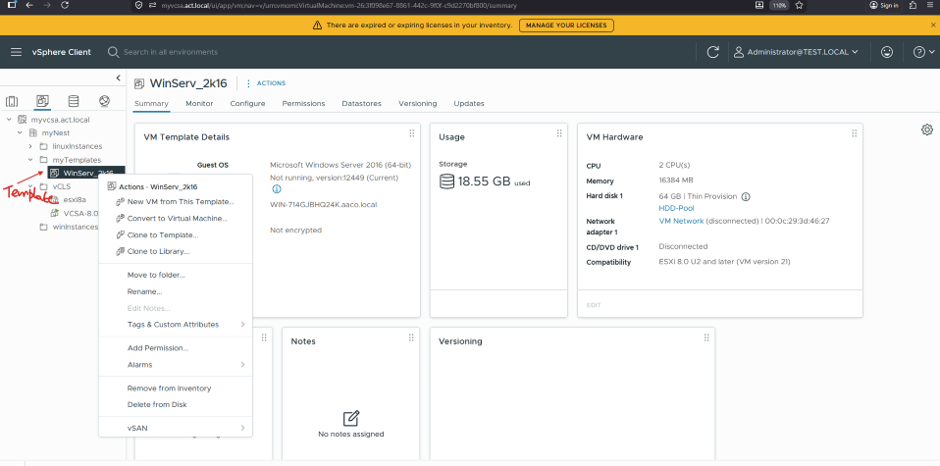
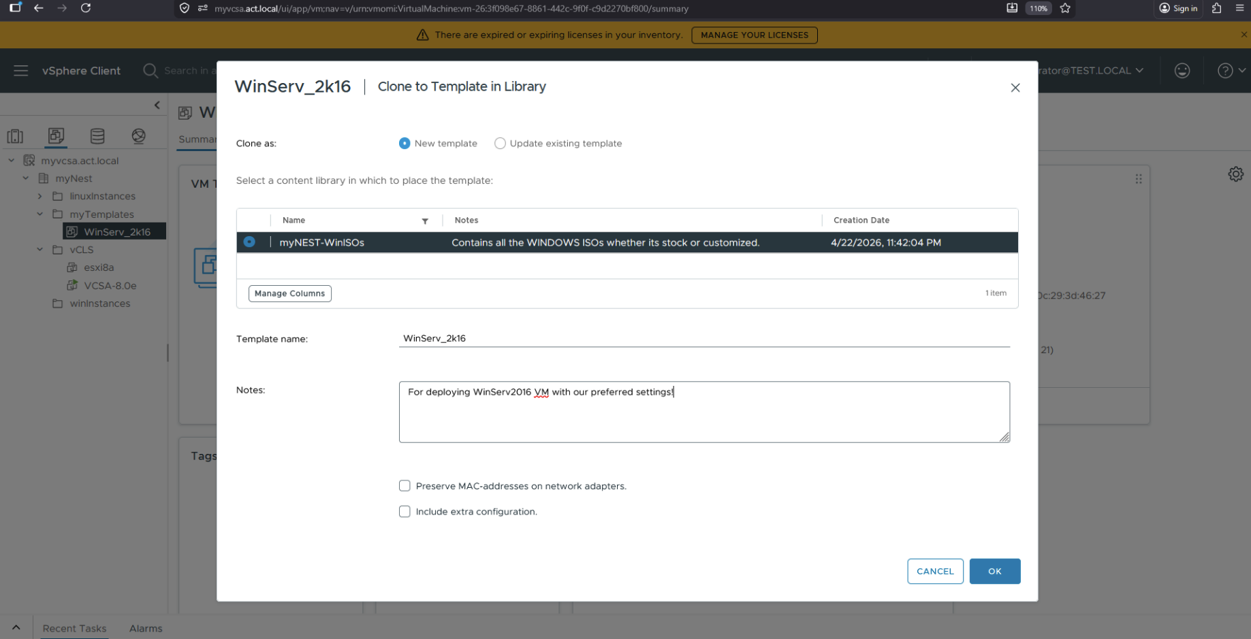
Mentioning the NOTES here:
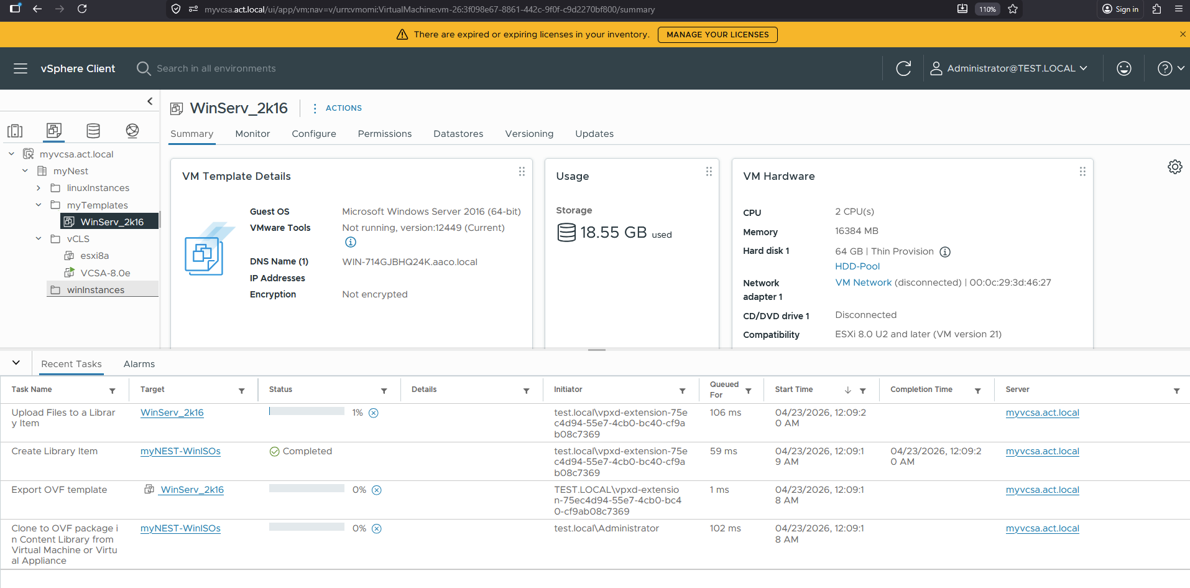
A total of 4 processes starts which takes several minutes to completes!
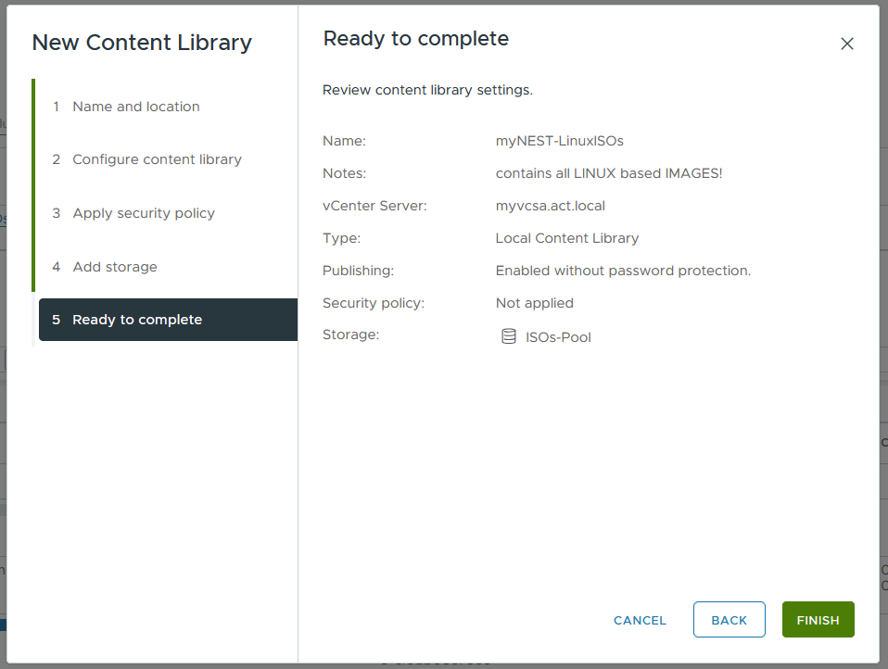
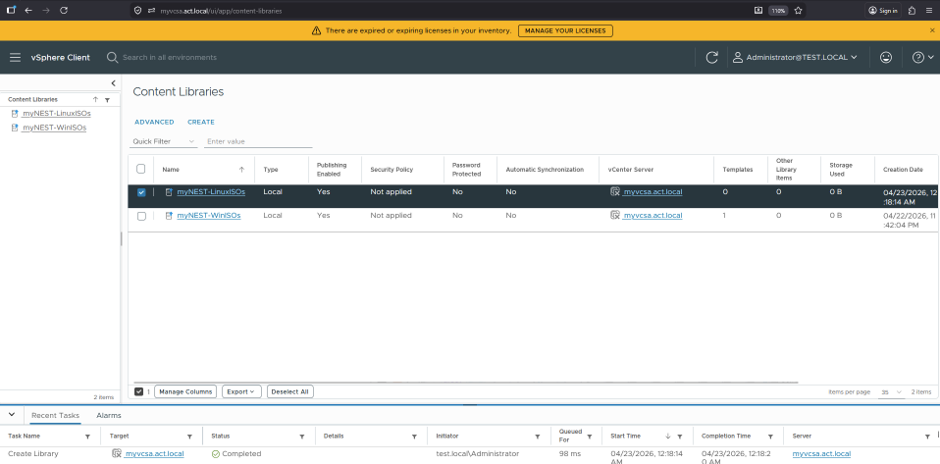
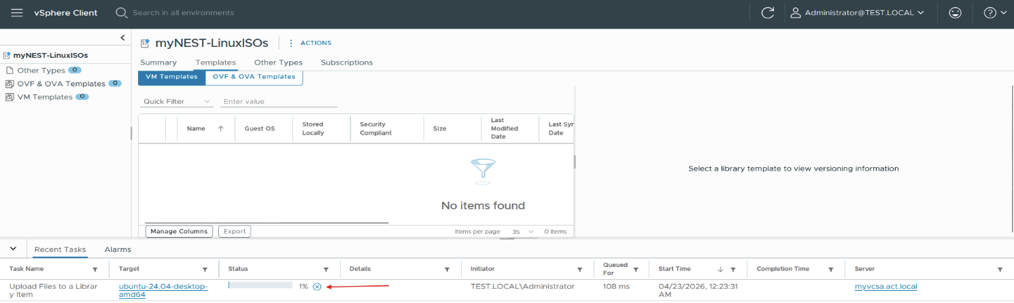
Similarly, created **a secondary Content Library (**myNEST-LinuxISOs ) - containing LINUX Images within same datastore!
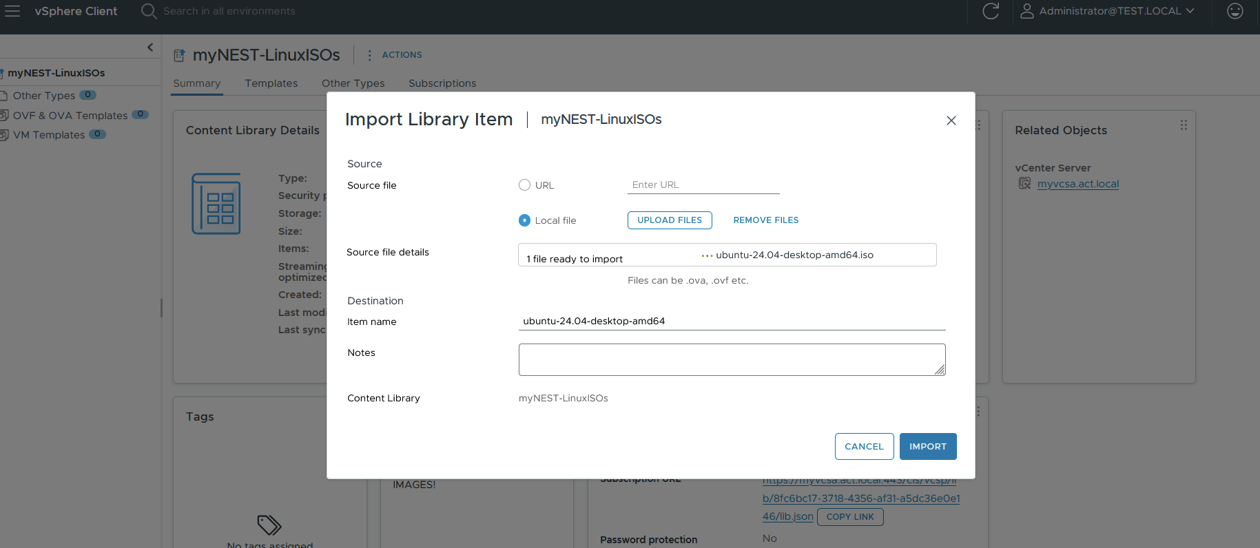
UBUNTU ISO Added:
🔄 Sync Options:
Immediately → downloads all content at once
When needed → downloads only when used (saves storage).
🌍 Real-world use case:
HQ creates a standard VM template library
Branch offices subscribe to it
All locations stay consistent automatically
Feature | Local Content Library | Subscribed Content Library |
Content creation | ✅ Yes | ❌ No |
Editable | ✅ Yes | ❌ Read-only |
Source of truth | ✅ Yes | ❌ No |
Sync from external | ❌ No | ✅ Yes |
Publishing capability | ✅ Yes | ❌ No |
Use case | Create & manage templates | Consume shared templates |
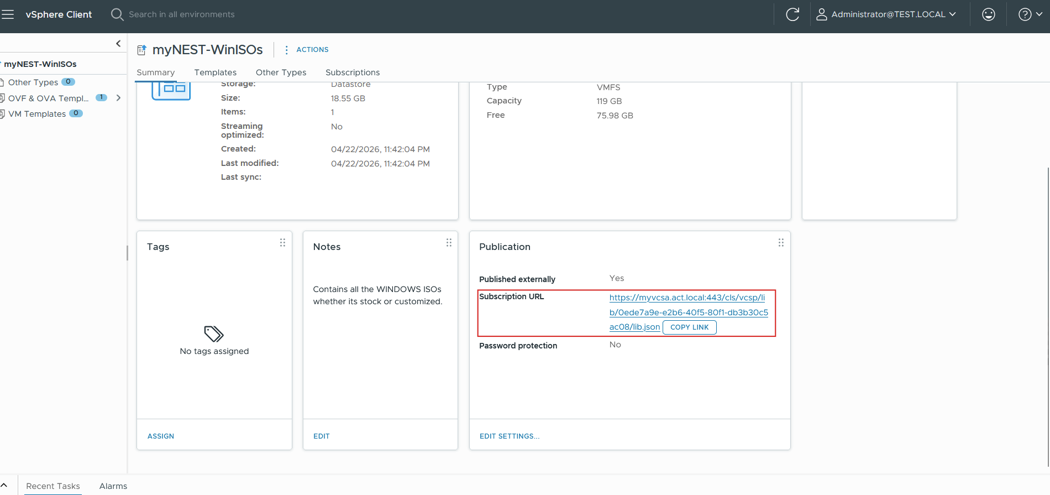
NOTE: Subscription URL is useful when configuring & using the Content Library across multiple vCenters.
Creating a NEW VM from TEMPLATE containing in Content Library
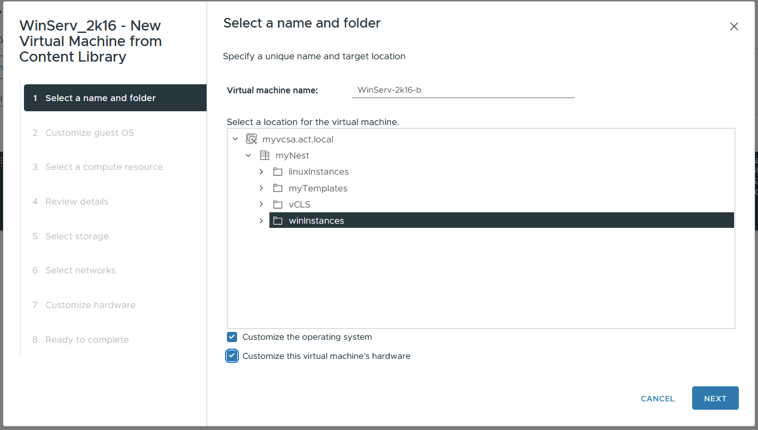
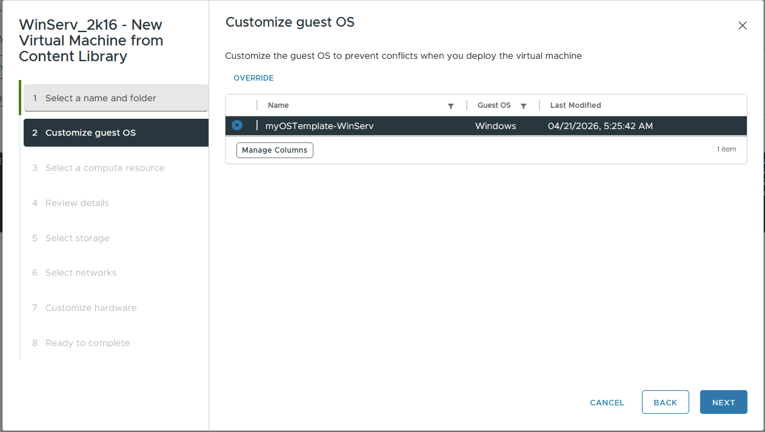
As configured in “Policies & Profiles”
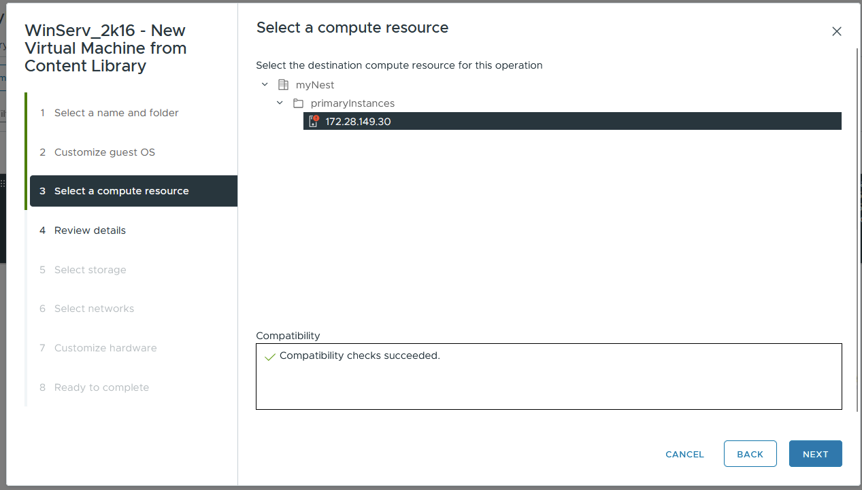
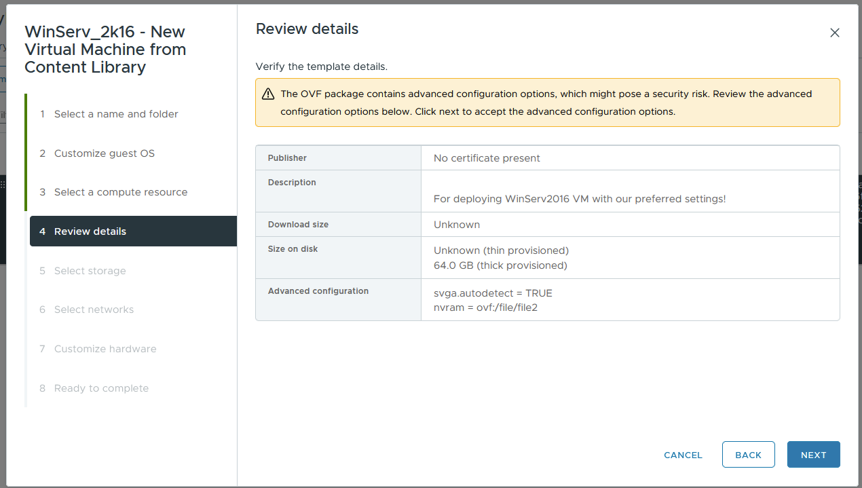
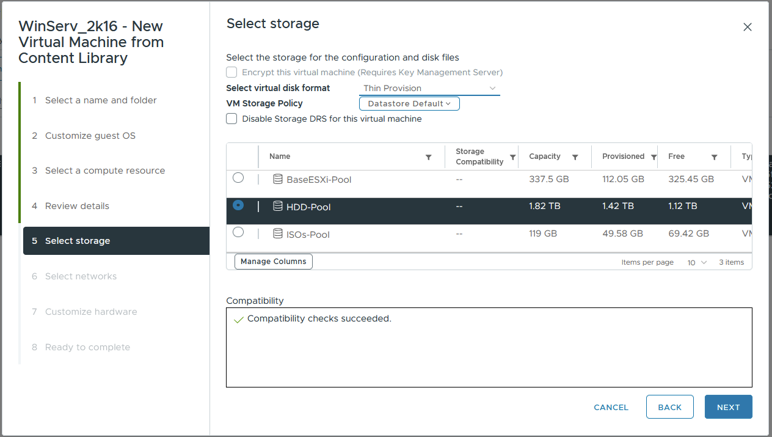
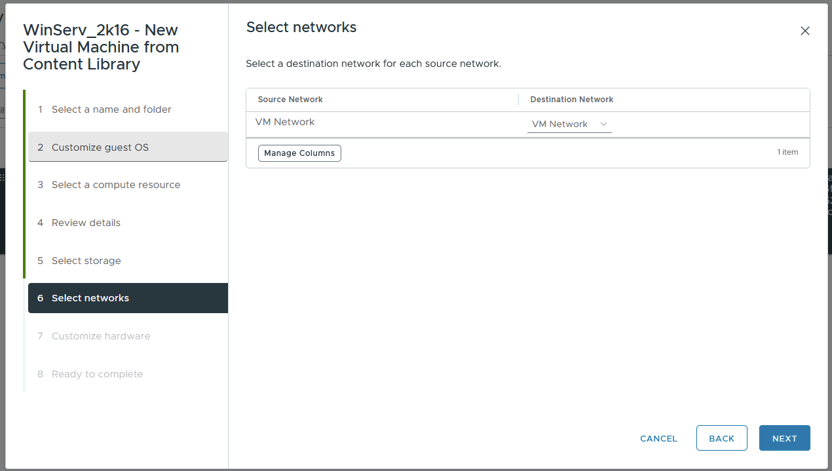
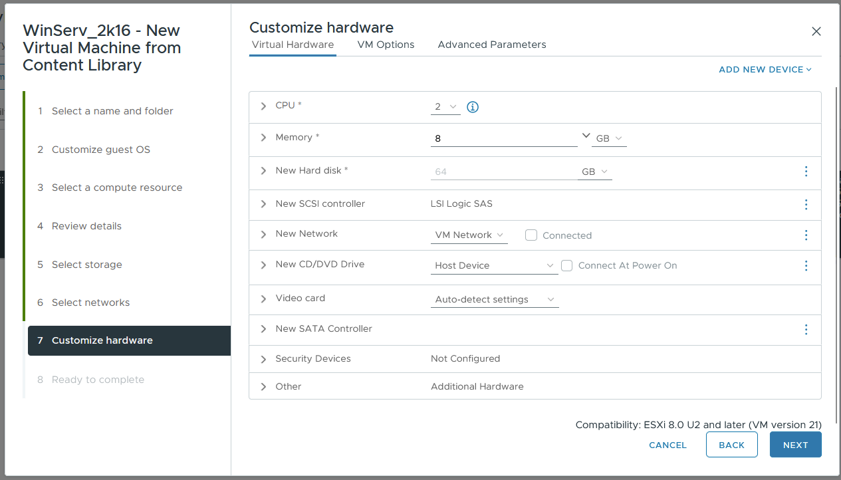
Configured as per the TEMPLATE with no changes applied!
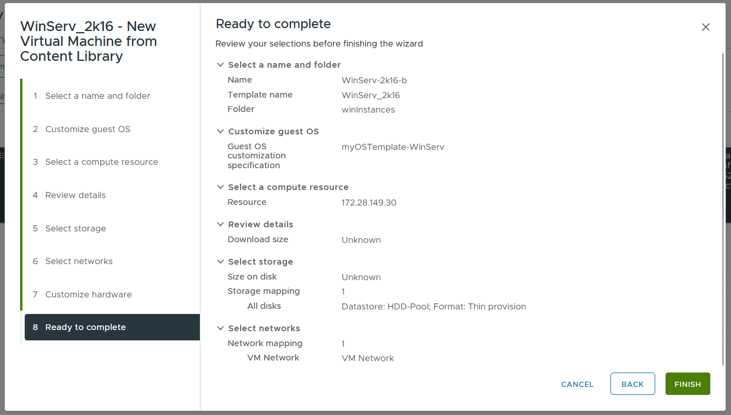
After FINISH, we see the VM Creation starts.
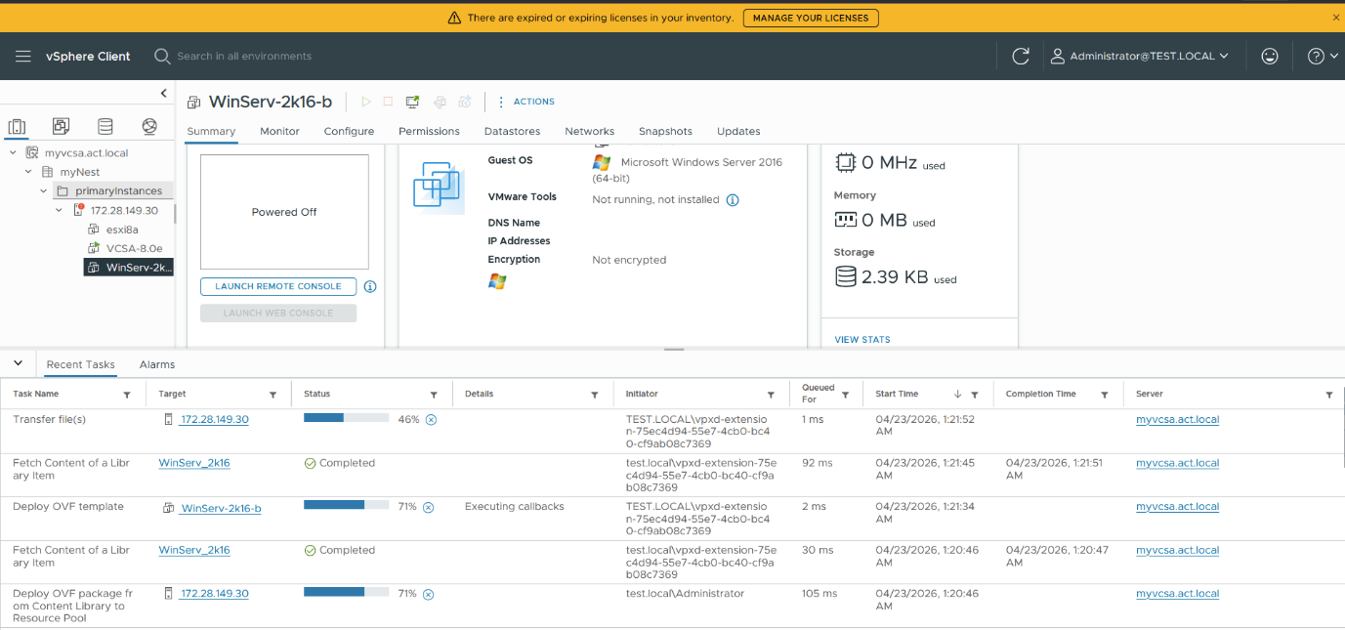
IT WORKED!
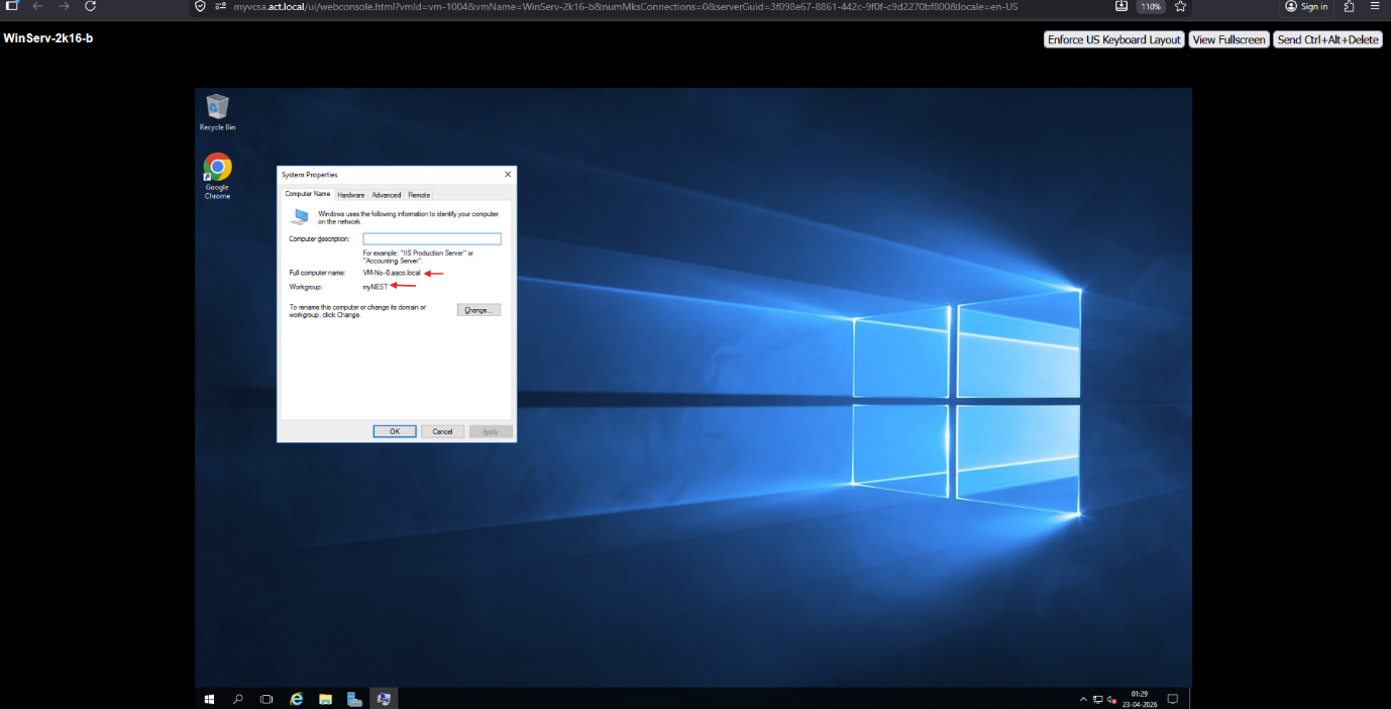
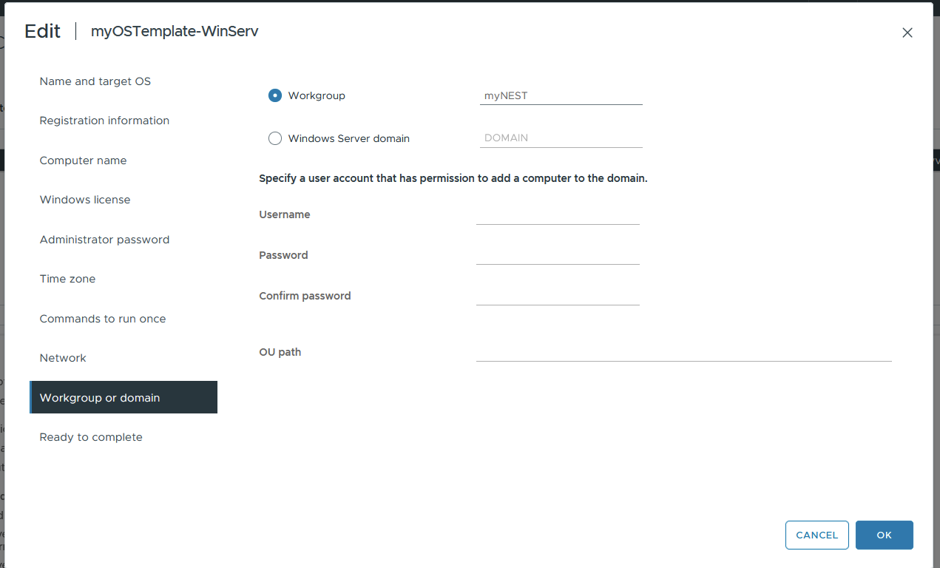
And this time I changed my OSTemplate (from Policies & Profiles) from DOMAIN JOIN to WORKGROUP-myNEST.
RESULT
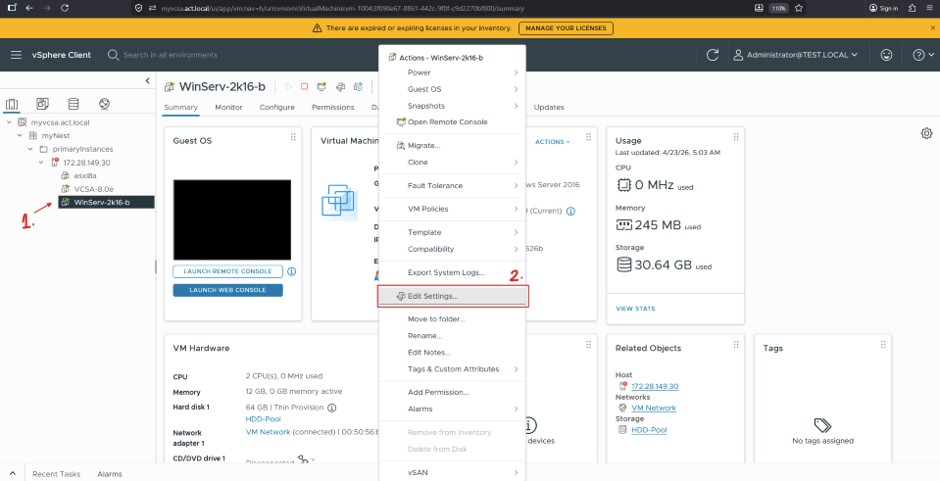
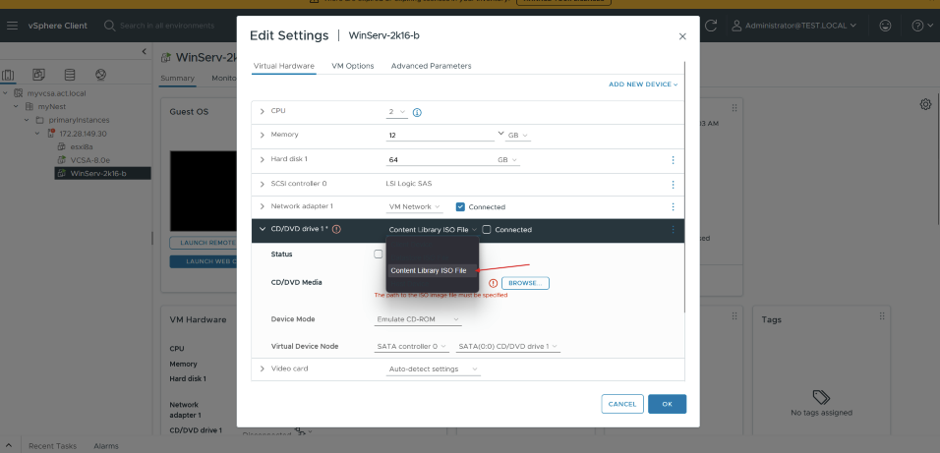
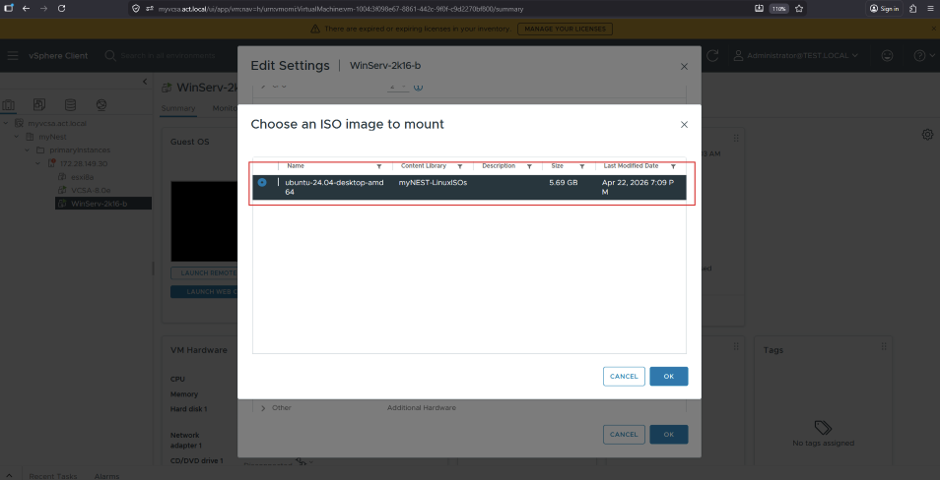
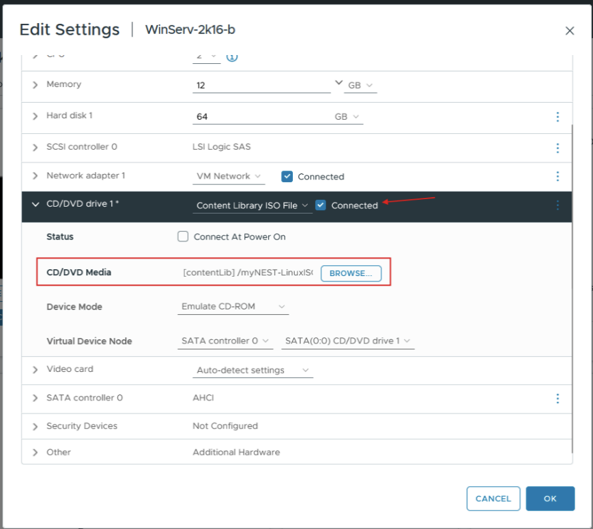
ATTACHING Content Library’s ISO to an EXISTING VM
Since Content Library also gives the feature of containing all types of ISOs along with TEMPLATE VERSIONING!
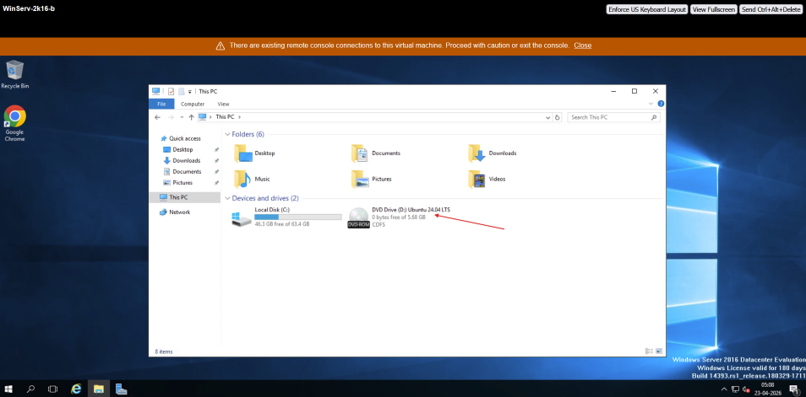
To test it out I relied on a random Ubuntu ISO which I mounted on my existing VM whether its fetching it or not!